How to Clean a Chicco Infant Car Seat the Right Way
If you’re wondering how to clean a chicco infant car seat, you’re probably staring at a mess right now. Spit-up, crumbs, maybe a blowout that got everywhere. It’s a common situation, but cleaning an infant car seat isn’t like washing a load of laundry.
Make a mistake and you could compromise the very thing that keeps your baby safe in a crash.
That’s because car seats are built to meet strict federal safety standards, specifically FMVSS 213 in the US. Every component, from the harness webbing to the flame-retardant cover fabric, is tested as part of a system. Use the wrong cleaner or method and you risk damaging that system.
So before you reach for the bleach or toss the cover in the dryer, let’s walk through the right way to do it.
Quick Answer
To clean a Chicco infant car seat, remove the cover and wash it on cold gentle cycle. Air dry only. Spot clean the harness straps with a damp cloth.
Never submerge them. Wipe the buckle and plastic shell with mild soap and water. Let every part dry completely before reassembling.
Why Cleaning Your Chicco Car Seat Wrong Can Make It Unsafe
Cleaning mistakes don’t just ruin the fabric. They can make the seat unsafe in a crash. The harness webbing is engineered to withstand specific forces.
Per NHTSA standards, it must hold up under extreme tension. A machine wash or a soak in water can fray the fibers or weaken them. The same goes for the buckle.
Submerging it can cause corrosion on the inside. That can make the buckle jam or fail to release when you need it most.
The cover fabric is treated with flame retardants. Harsh cleaners like bleach, vinegar, or even some detergents can strip that treatment. That’s a safety issue, not just a stain problem.
Here are the most common mistakes that can compromise safety:
- Machine washing the harness straps
- Soaking the buckle in water
- Using bleach or vinegar on any part
- Putting the cover in the dryer (it shrinks and warps)
- Using fabric softener on the cover (it damages the fire-resistant coating)
If your baby is uncomfortable in the seat, a dirty seat can make that worse. But fixing the mess is a separate issue from ensuring the seat is safe. For tips on keeping them settled, check out this guide on how to calm baby in car seat.
Bottom line: read the manual first. Every cleaning method should follow manufacturer guidelines. Don’t make assumptions.
Before You Touch Anything: Find Your Model and Read the Manual
Before you clean anything, you need to know exactly which Chicco model you have. The cleaning instructions can vary slightly between models like the KeyFit 30, KeyFit 35, and Fit2. The model number is printed on a white sticker on the side of the seat shell.
It’s also on the bottom of the base if you have a travel system.
Once you have the model number, find the manual. The manual is the final authority on how to clean your specific seat. If you’ve lost the paper copy, Chicco’s website has PDFs of all manuals.
You can search by model number.
The manual will tell you what’s washable, what’s not, and what temperature to use. It will also list any warnings specific to your model. Don’t skip this step.
While you’re looking at the model number, it’s a good idea to check for recalls. The NHTSA website has a recall search tool where you can enter the model number. If there’s a recall, cleaning the seat isn’t enough.
You need to follow the recall instructions first.
If you’re using a secondhand car seat, check the manufacturing date. The sticker usually includes the date. Car seats have expiration dates, typically six years from manufacture.
If the seat is expired, you need to replace it, not clean it.
For more on safe car seat use, see our guidance on can babies sleep in car seats. It covers the risks of leaving a baby in a car seat outside the car.
The Golden Rule: Which Parts Can Be Washed and Which Can’t
Here’s the breakdown of what you can and cannot do with each part of a Chicco infant car seat. This is based on the manufacturer’s guidelines for most models. Always double-check your manual.
| Part | Wash Method | Drying Method | Notes |
|---|---|---|---|
| Cover (fabric) | Machine wash cold gentle cycle, or hand wash | Air dry only, away from heat | Use mild detergent. No bleach, no fabric softener. |
| Newborn insert | Same as cover | Same as cover | Remove foam pieces first. |
| Harness straps | Spot clean only with damp cloth and mild soap | Air dry flat | Never submerge, machine wash, or use bleach. |
| Buckle | Wipe with damp cloth only | Air dry | Do not use soap. Do not submerge. |
| Chest clip | Wipe with damp cloth and mild soap | Air dry | Can be removed from straps on some models. |
| Plastic shell | Wipe with mild soap and water | Air dry | Avoid getting water into buckle housing. |
| Base | Wipe with mild soap and water | Air dry | Check for LATCH belt dirt. |
| Canopy | Machine wash cold gentle cycle | Air dry | Check manual first. Some canopies are hand wash only. |
The most important rule: never put anything in the dryer. Heat shrinks the fabric and can damage the foam padding. Air drying takes longer, but it’s the only safe method.
If you’re outfitting your baby’s gear, you might also want to check our newborn essentials checklist for other must-have items.
Step-by-Step: Removing and Washing the Cover the Right Way
Here’s how to remove and wash the cover on most Chicco infant car seats. The exact steps may vary, but the general process is the same.
- Remove the seat from the base. Uninstall it from the car first.
- Remove the canopy. It usually snaps or slides off.
- Remove the newborn insert and head support. These are separate pieces.
- Take out any foam pieces. These are not washable. Set them aside.
- Unsnap or unzip the cover. Most Chicco covers have a zipper along the back and elastic that wraps around the shell. Slide the cover off the shell.
- Wash the cover. Machine wash on cold gentle cycle with a mild detergent. Do not use bleach or fabric softener. If you prefer hand washing, use cold water and a mild soap.
- Air dry the cover. Hang it or lay it flat away from direct sunlight and heat. It can take 24 to 48 hours to dry completely.
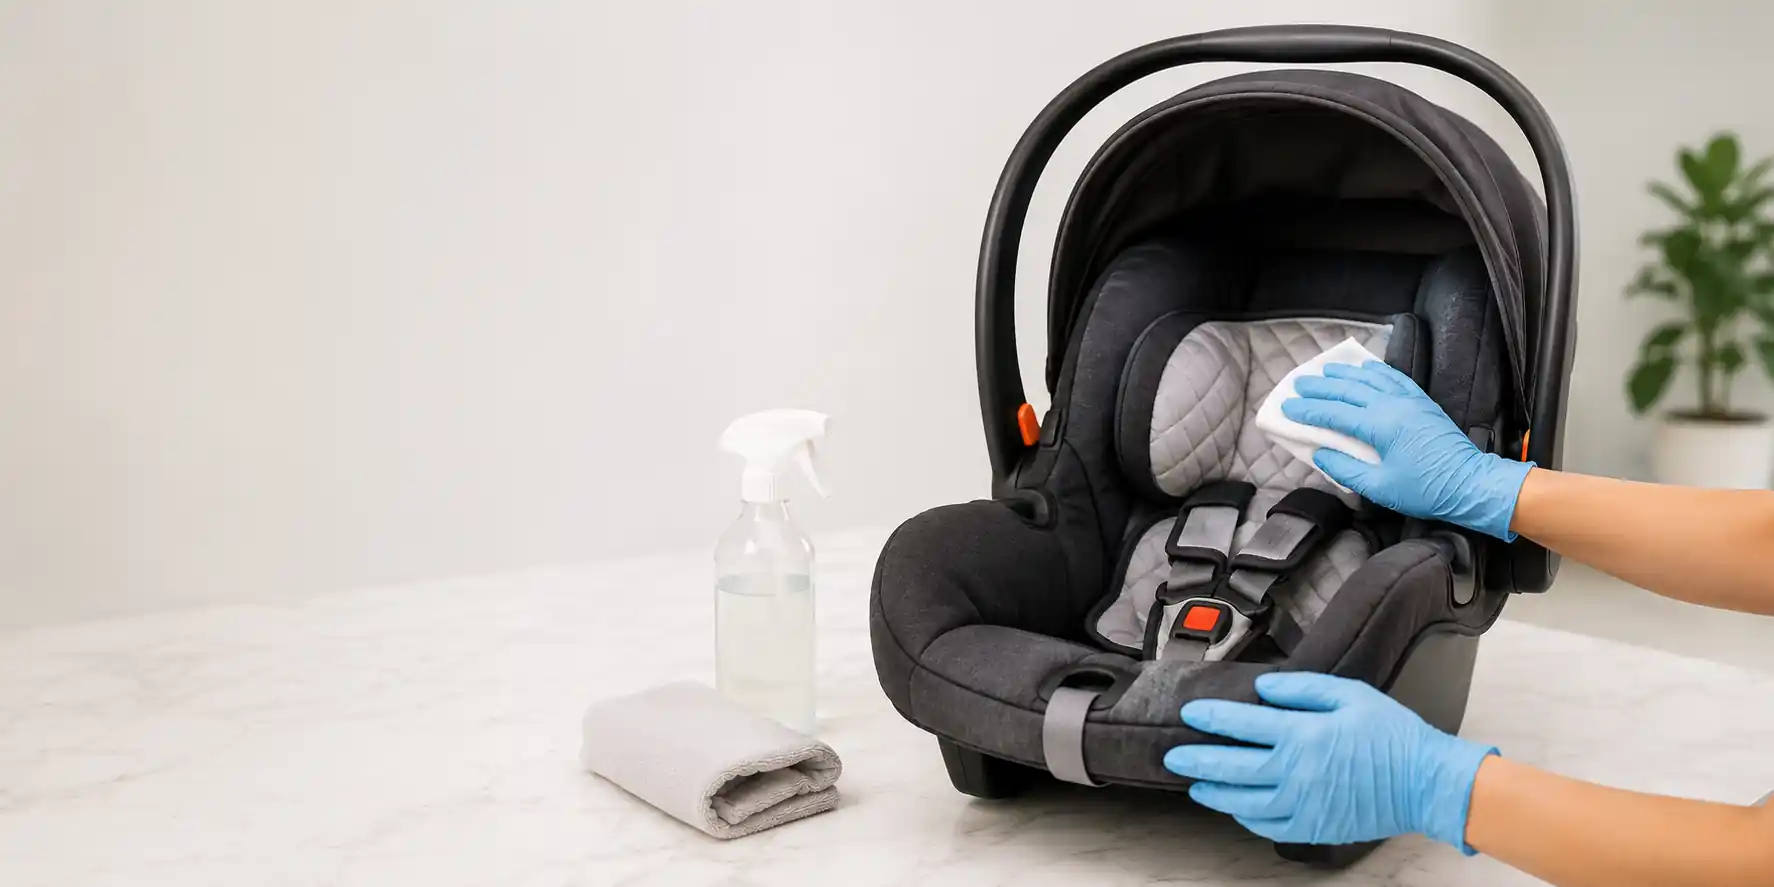
- While the cover is drying, clean the plastic shell. Wipe it down with a cloth dampened with mild soap and water. Dry it with a clean towel.
- Once the cover is completely dry, reassemble. Put the foam pieces back in place, slide the cover back on, and reattach the canopy and inserts.
- Reinstall the seat in the car. Check that the harness is at the correct height and the seat is tight.
A note on the foam pieces: they are not washable. If they get wet, let them air dry completely. Do not machine wash them.
For a complete list of supplies you might need for your baby, see our baby essentials guide.
How to Clean the Harness Straps Without Damaging Them
The harness straps are the most important safety part of the car seat. They hold your baby in place during a crash. Cleaning them wrong can weaken them.
The only safe method is spot cleaning. Use a soft cloth dampened with water and a tiny amount of mild detergent. Wipe the straps gently.
Do not scrub. Do not soak. Do not submerge.
After wiping, use a clean damp cloth to remove any soap residue. Then let the straps air dry completely before using the seat. This can take a few hours.
Never use bleach, vinegar, hydrogen peroxide, or any harsh chemicals on the straps. These can weaken the fibers. Never machine wash the straps.
Never put them in the dryer. Never use fabric softener or dryer sheets.
If the straps are heavily soiled with food, mold, or something that won’t come off with spot cleaning, you have two options. One, contact Chicco customer service for guidance. Two, replace the harness straps.
Do not try to soak them clean.
The same rules apply to the buckle. Wipe it with a damp cloth only. Do not use soap.
Do not submerge. If the buckle is sticky or hard to click, it may need to be replaced. Do not try to lubricate it.
If your baby is sick with a fever, you might need to clean the car seat more often. For information on when to take baby to urgent care for fever, check our urgent care guide.
Cleaning the Buckle and Chest Clip (It’s Tricky – Do It Right)
The buckle is the part people mess up most often. It’s also the one that causes the most frustration when it stops working. A sticky or jammed buckle is almost always the result of improper cleaning.
Here’s the rule: do not submerge the buckle. Do not use soap. Do not spray anything into the slot where the tongues insert.
Water and soap residue get trapped inside the buckle mechanism. Over time, that causes corrosion and sticking.
The correct method is simple. Dampen a soft cloth with clean water. Wring it out so it’s only slightly wet.
Wipe the outside of the buckle and each tongue. Dry immediately with a separate dry cloth. That’s it.
If the buckle is already sticky, you may need to repeat this process several times. Let the buckle dry fully between attempts. Do not use any lubricant.
Do not use a toothpick or pin to poke inside. If it doesn’t free up after a few cleanings, contact Chicco for a replacement buckle.
The chest clip is less sensitive. You can wipe it with a cloth dampened with mild soap and water. Rinse with a clean damp cloth.
Dry it completely. The chest clip does not have the same internal mechanism as the buckle, so it’s harder to damage.
One more thing: check the buckle regularly for cracks or wear. If the plastic is damaged, replace the buckle immediately. A cracked buckle can release in a crash.
For parents dealing with a sick baby who may need extra cleaning, knowing what symptoms require medical attention is important. Our guide on taking baby to urgent care for fever can help you decide when to call the doctor.
The Plastic Shell and Base: Simple Wipe-Downs That Work
The plastic shell and base are the easiest parts to clean. They don’t have the same safety restrictions as the harness or buckle. But you still need to be careful.
Mix a small amount of mild dish soap with warm water. Dip a soft cloth in the solution and wring it out. Wipe down the entire plastic shell.
Pay attention to the areas where the harness straps pass through. Dirt and crumbs collect there.
For the base, wipe down the top surface and the sides. Check the LATCH belt for dirt. If the LATCH webbing is dirty, wipe it with a damp cloth.
Do not submerge it or machine wash it.
Do not spray cleaner directly onto the plastic. It can seep into cracks or the buckle housing. Always spray onto the cloth first.
Dry everything with a clean towel. Make sure no moisture pools in the harness strap slots or around the buckle housing. Leave the seat upside down for an hour to let any trapped water drain out.
If you’re cleaning a used car seat before your baby’s arrival, you should also check that the infant insert is clean and properly positioned. Our newborn essentials checklist includes everything you need for the first weeks.
Drying: The Most Overlooked Step (And Why It Matters)
Drying is where most people rush. You want the seat back in the car, so you put the cover in the dryer or set it in the sun. Both are bad ideas.
The cover fabric shrinks in high heat. If it shrinks, it won’t fit the shell properly. A loose or tight cover can affect how the harness fits your baby.
The foam padding inside the cover can also warp in the dryer. Warped foam doesn’t provide the same protection in a side-impact crash.
Air drying is the only safe method. Here’s how to do it right:
- Hang the cover on a clothesline or drying rack in a well-ventilated room
- Keep it out of direct sunlight (UV rays can weaken the fabric)
- Lay foam pieces flat on a towel to air dry
- Let the harness straps air dry after spot cleaning (2-4 hours)
- Let the buckle air dry completely before reassembly
How long does it take? A full cover can take 24 to 48 hours to dry completely. Foam pieces can take 24 hours.
The plastic shell dries in about an hour.
Do not use a hairdryer, space heater, or radiator to speed things up. High heat damages the materials.
If you only spot-cleaned the straps and plastic shell, the seat may be dry in a few hours. But for a full cleaning with the cover removed, plan for the seat to be out of use for two full days. That’s normal.
Common Mistakes That Compromise Safety
Let’s run through the mistakes we see most often. These are based on aggregate user feedback and manufacturer warnings. Avoid them and your seat will stay safe.
Using bleach or vinegar. Both are too harsh. Bleach weakens fabric fibers and destroys flame retardants. Vinegar can corrode metal parts including the buckle.
Stick to mild dish soap or a gentle laundry detergent.
Machine washing the harness straps. The tumbling action frays the webbing. The detergent strips the fibers. The heat shrinks them.
Always spot clean only.
Submerging the buckle. Water gets trapped inside the mechanism. It rusts the internal spring. The buckle jams or fails.
Just wipe it.
Using fabric softener or dryer sheets on the cover. These coat the fabric with a waxy layer that reduces flame retardancy. They also attract more dirt. Skip them.
Putting the cover in the dryer. Shrinkage and warping are guaranteed. Air dry only.
Forgetting to remove foam pieces before washing. The foam can break apart in the machine. It can also melt in the dryer. Check the cover’s pockets before washing.
Reinstalling while still damp. Moisture trapped under the cover or in the foam can grow mold. Mold spores are a respiratory hazard for your baby. Wait until everything is bone dry.
Not checking the manual for model-specific steps. Each model has small differences. The KeyFit 35 and Fit2 have different cover attachment points. The NextFit straps route differently.
The manual tells you exactly what to do.
For more information on safe sleep and car seat use outside the car, see our expert advice on can babies sleep in car seats.
Stain Removal and Odor Troubleshooting
Sometimes a simple wash isn’t enough. Milk, formula, and food stains can set in. Odors can linger even after cleaning.
Here’s how to handle the tough stuff.
Milk and formula stains. Pre-treat with a small amount of mild detergent directly on the stain. Let it sit for 15 minutes. Then wash the cover normally.
Do not use stain removers or bleach alternatives. Most contain hydrogen peroxide which can damage the fabric.
Blowout stains. These are the toughest. Scrape off as much solid matter as possible before washing. Rinse the stain with cold water from the back of the fabric.
This pushes the stain out rather than deeper in. Then wash on cold gentle cycle.
Odor in the harness straps. Sweat and spilled milk can soak into the webbing. Spot clean with a mild soap solution. Rinse thoroughly.
Let the straps dry in fresh air. If the smell persists, contact Chicco about replacement straps. Do not soak or machine wash them.
Mold on the cover or foam. If you left the seat damp for too long, you might see dark spots. Small mold spots can sometimes be cleaned with a mild soap solution. Test a hidden area first.
If the mold is widespread, replace the cover. Mold in the foam means you need to replace the entire seat. Foam cannot be cleaned effectively.
General odor in the plastic shell. Wipe the shell with a mixture of mild soap and water. Dry it completely. Leave the shell upside down in a well-ventilated room overnight.
The smell should dissipate.
If you’re stocking up on baby gear, our baby essentials guide has a full list of what you actually need for the first year.
When to Replace Parts Instead of Just Cleaning
Some messes can’t be fixed with soap and water. If the harness straps are frayed, faded, or stiff, replace them. Chicco sells replacement harness kits for most models.
The same goes for the buckle. If it’s cracked, sticky, or won’t click properly, don’t try to fix it. Order a new buckle.
The chest clip is less critical, but if it’s cracked, swap it.
The cover can be replaced if it’s torn or heavily stained. A new cover costs about $40 to $70. That’s cheaper than a new seat.
Check Chicco’s website for your model.
Foam pieces are not replaceable separately on most models. If the foam is damaged or compressed, you may need to replace the entire seat. The same applies if the plastic shell has any cracks.
Final Safety Check Before You Reinstall
Before you put the seat back in the car, do a thorough check. First, make sure every part is completely dry. Touch the foam, the straps, and the buckle.
Any moisture means more drying time.
Second, check that the harness straps are not twisted. They should lie flat against the shell. Twist them back if needed.
Third, test the buckle. Insert each tongue. It should click firmly.
Pull on the straps to make sure the buckle holds. Press the release. It should pop open easily.
Fourth, check the harness height. It should be at or just below your baby’s shoulders for rear-facing. Adjust if needed.
Finally, reinstall the seat using the LATCH system or seat belt. The seat should not move more than one inch at the belt path. If it’s loose, tighten it.
For more on safe car seat installation, see our calming baby in car seat guide.
Quick Cleaning Checklist for Next Time
Keep this list handy for the next spill or blowout. It covers the essentials.
- Read the manual for your specific model
- Remove the cover and foam pieces
- Machine wash the cover on cold gentle cycle
- Air dry the cover (24-48 hours)
- Spot clean the harness straps with a damp cloth
- Wipe the buckle with a damp cloth only
- Wipe the plastic shell with mild soap and water
- Dry every part completely
- Reassemble and check harness height
- Reinstall and test for tightness
Stick to this routine and your seat stays clean and safe. For a full list of supplies you’ll need for your baby, check our baby essentials guide.
Frequently Asked Questions
Can I use baby wipes on the harness straps?
Yes, but only for quick spot cleaning. Baby wipes are mild enough. But they don’t replace a proper cleaning with a damp cloth.
Never soak the straps.
How often should I clean the car seat cover?
Every three to six months for routine cleaning. After a blowout or heavy spill, clean it immediately. More frequent washing is fine if you follow the right method.
Can I use a steam cleaner on the plastic shell?
No. Steam can warp the plastic and damage the foam. Stick to a damp cloth with mild soap.
It’s safer and just as effective.
What detergent is safe for the cover?
Any mild, bleach-free detergent works. Avoid anything with fabric softeners, stain removers, or whiteners. A small amount of gentle laundry soap is best.
How do I know if the harness straps are damaged?
Look for fraying, fading, stiffness, or any signs of wear. If the straps don’t lie flat or feel rough, replace them. Damaged straps won’t hold in a crash.