When Is Baby Too Big for Infant Car Seat? Parent Guide
You might wonder if a few extra weeks in an infant seat really matter. They do. Crash data backs this up.
Infant car seats are designed to protect a baby’s head, neck, and spine. The hard plastic shell and energy-absorbing foam work together. They slow down the forces on your child’s body in a collision.
But this protection only works if the baby fits correctly.
When a baby’s head gets too close to the top of the shell, there’s no more room for the foam to do its job. In a front-end crash, the head can strike the vehicle seat or the inside of the shell. The National Highway Traffic Safety Administration has documented increased injury risk when seats are used beyond their limits.
The American Academy of Pediatrics recommends rear-facing as long as the seat allows. But using an infant seat past its limits is not safer than moving to a convertible. It’s the opposite.
You’re trading familiar convenience for inadequate protection.
Quick Answer: The 1-Inch Rule and the 3 Clear Signs
Your baby is too big for an infant car seat when their head is within one inch of the top of the shell. Check the weight and height limits on the seat label. The harness straps must be at or below the shoulders.
The crotch buckle should not dig into their thighs.
Those are the hard rules. The rest is details.
How Infant Car Seats Are Engineered to Protect (Shell, Harness, Base)
Understanding the design helps you know why these limits exist.
The shell. That hard plastic bucket is not just a container. It’s engineered to absorb and distribute crash forces. The foam lining crushes on impact, which slows down the baby’s deceleration.
Once the head passes the top of that shell, the foam can’t do its job.
The harness. The five-point system distributes crash forces across the strongest parts of the body. The shoulders, the hips, and the pelvis. The straps must stay at or below the shoulders for rear-facing.
If they’re above, the baby can slide up in a crash. That’s called ramping, and it’s dangerous.
The base. The base holds the seat tight against the vehicle seat. Some models have a load leg that pushes against the floor. Others use an anti-rebound bar.
These features reduce movement in a crash. But none of them matter if the baby has outgrown the carrier itself.
The whole system relies on proper fit. Every component works together. When one part fails, the whole safety chain breaks.
The 1-Inch Rule Explained – Measuring Head Clearance Correctly
This is the single most important check you can do.
Here’s how to measure it right.
Step one. Place your baby in the seat. Remove any aftermarket head supports or inserts that came with the seat. Only use the manufacturer’s original padding.
Step two. Buckle and tighten the harness properly. The chest clip should be at armpit level. The straps should be snug.
You should not be able to pinch any slack at the collarbone.
Step three. Look at the top of the plastic shell. Find the highest point of the hard shell, not the padding. It’s usually the section above the baby’s head.
Step four. Measure the distance from the top of your baby’s head to that highest point. Use your fingers. If you can fit less than one finger width of space, the seat is too small.
The 1-inch rule is a minimum. Some experts recommend two inches for extra safety. But one inch is the industry standard.
Every manufacturer lists it in their manuals.
Check this every month. Babies grow fast. A seat that fit last week might not fit this week.
A common mistake is measuring from the fabric canopy or the top of the padding. Do not do that. Only the hard plastic shell matters.
The fabric can compress in a crash. The shell is what protects.
Weight vs. Height: Which Limit Do You Hit First?
Most infant seats have two limits. A weight limit and a height limit. The seat is outgrown when you hit either one.
Weight limits. Typically range from 22 to 35 pounds. Some newer models go up to 40 pounds. Check the sticker on the side of the seat.
It’s usually printed right next to the weight limit.
Height limits. Usually range from 29 to 32 inches. This is measured from the top of the baby’s head to the bottom of the seat. Not standing height.
The seat height limit is about the baby’s seated height, not their total height.
In our research, most babies hit the height limit before the weight limit. This is especially true for long, lean babies. The 1-inch rule catches them first.
A chunky baby might hit the weight limit first. It depends on your child’s build.
The height limit is the more important number. Even if your baby is under the weight limit, they can outgrow the seat by height. The head clearance rule overrides everything else.
Here’s a simple breakdown of what to watch for:
| Check | What to look for | When to switch |
|---|---|---|
| Head clearance | Less than 1 inch from top of shell | Immediately |
| Weight | Reached or exceeded printed limit | Immediately |
| Height | Reached or exceeded printed limit | Immediately |
| Harness slots | Straps are below baby’s shoulders | Check fit; may still be OK |
| Crotch buckle | Buckle digs into baby’s thighs | May need to adjust or switch |
The weight and height limits are printed on the seat label. They are also in the manual. Do not guess.
Look it up.
Some seats have adjustable headrests that raise the height limit. If your seat has this feature, check the manual. It might extend the usable life of the seat.
But the 1-inch rule still applies. The adjustable headrest moves the shell up, so the head clearance changes. Measure carefully.
If you’re unsure about your baby’s measurements, a pediatrician can help. You can also visit a certified child passenger safety technician. They can check the fit for free.
Many local fire stations and police departments have them. It’s a simple check that could save your baby’s life.
The Harness and Crotch Buckle – Hidden Outgrow Signals
The head clearance rule gets the most attention. But the harness and crotch buckle can tell you it’s time to switch before the 1-inch rule does.
Harness slot position. For rear-facing, the harness straps must be at or below your baby’s shoulders. Check this every time you buckle up. If the straps are coming from above the shoulders, the seat is too small.
The baby can slide up the seat in a crash. This is called ramping, and it puts dangerous forces on the neck.
Some seats have adjustable headrests that move the harness slots up as the baby grows. If yours has this, check the manual. The headrest might extend the usable height range.
But the rule stays the same. The straps must remain at or below shoulder level.
The crotch buckle. This is the buckle between your baby’s legs. It should sit flat against the crotch area. If it digs into the thighs or the baby’s legs are splayed around it, the buckle is too short.
The crotch buckle has a fixed position in most infant seats. Some models have two positions. A forward position for smaller babies and a rearward position for larger ones.
Check your manual. You might be able to move it.
A digging crotch buckle is uncomfortable. It can also prevent proper harness tightening. A loose harness is a safety risk.
If the buckle is digging in and you cannot adjust it, the seat is outgrown.
The tightness test. The harness should be snug. You should not be able to pinch any webbing at the collarbone. The chest clip should be at armpit level.
If you cannot get a snug fit because the baby is too big, the seat is outgrown.
What About Legs Touching the Seat Back? (It’s Not What You Think)
This is the most common question we hear from parents. My baby’s legs are touching the vehicle seat. Is it time to switch?
The answer is no. Legs touching the seat back is not a sign of outgrowing an infant car seat.
Babies are flexible. They can bend their knees and rest their feet on the seat back. This is normal and safe.
Crash data shows that rear-facing children in a crash tuck their legs up naturally. The risk of leg injury is very low. The risk of head and neck injury in a forward-facing position is much higher.
The AAP and NHTSA both confirm this. Rear-facing legs are not a safety concern. The legs can be bent, crossed, or resting on the seat back.
None of these positions are dangerous.
The only time leg position matters is if the baby cannot sit comfortably. If the baby is crying and cannot stretch their legs, check the seat fit. But this is rarely a reason to switch.
Most babies find a comfortable position on their own.
Some parents worry about leg cramps or discomfort. In our research, there is no evidence that rear-facing causes leg problems. Babies are naturally flexible.
They will find a comfortable position.
The real reason to switch is head clearance, weight limits, or harness fit. Not leg position. Keep your baby rear-facing as long as the seat allows.
Common Mistakes That Lead to Using an Infant Seat Too Long
Parents make honest mistakes. Infant seats are convenient. Clicking them in and out of the base is easy.
So it’s tempting to keep using them past the safe limits.
Here are the most common mistakes we see.
Mistake 1: Ignoring the 1-inch rule. This is the big one. Parents check the weight and height on the label. They see the baby is under 30 pounds and 32 inches.
So they assume the seat is fine. But the 1-inch rule catches babies before the printed limits. Check it every month.
Mistake 2: Using the seat until the baby reaches the weight limit. The weight limit is only one of three rules. The height limit and the 1-inch rule are equally important. You can hit any one of them and need to switch.
Mistake 3: Thinking the seat is fine because the baby looks comfortable. Babies are adaptable. They might not show signs of discomfort. But the safety limits are based on crash testing, not comfort.
A comfortable baby can still be at risk.
Mistake 4: Not checking the manual. Every seat is different. Some have adjustable headrests. Some have different height limits.
The manual tells you exactly what to look for. Read it.
Mistake 5: Using aftermarket inserts or head supports. These can affect the harness fit. They can push the baby forward or change the head clearance. Only use the original padding that came with the seat.
Mistake 6: Waiting for the convertible seat to arrive. If your baby has outgrown the infant seat, stop using it. Use a convertible seat or find another option. Do not use an outgrown seat even for a short trip.
Mistake 7: Not checking the seat’s expiration date. Infant seats expire. The foam degrades over time. The plastic can become brittle.
Check the expiration date on the seat. If it’s expired, the seat is not safe to use.
When to Move to a Convertible Seat – Timing and Options
The timing is simple. Move to a convertible seat as soon as your baby outgrows the infant seat. Do not wait.
Do not push the limits.
Most babies outgrow their infant seat between 6 and 12 months. Some larger babies outgrow it at 4 months. Some smaller babies can stay in it until 15 months.
It depends on the seat and the baby.
Convertible seats are designed for rear-facing first, then forward-facing later. They have higher weight and height limits. Most can rear-face until 40 to 50 pounds.
Some go up to 65 pounds. This lets you keep your baby rear-facing well past the first birthday.
The AAP recommends rear-facing until at least age 2. Many experts say longer is better. Keeping your baby rear-facing until they reach the seat’s limits is the safest option.
What to look for in a convertible seat. The seat should fit your baby well. The harness should be at or below the shoulders. The head clearance should be at least one inch.
The seat should fit your vehicle. Some convertible seats are large and may not fit in smaller cars.
Installation is key. A convertible seat is only safe if it is installed correctly. The base should not move more than one inch side to side. The recline angle should be correct.
Most seats have a level indicator. Use it.
Consider having a professional check the install. Certified child passenger safety technicians can inspect your seat for free. Many fire stations, police departments, and hospitals offer this service. It takes about 20 minutes.
Step-by-Step: How to Check If Your Baby Has Outgrown the Seat Today
You can do this check in five minutes. Do it right now if you are unsure.
Step 1: Check the label. Find the weight and height limits on the side of the seat. Write them down. If your baby is at or above either limit, the seat is outgrown.
Step 2: Check head clearance. Place your baby in the seat. Buckle and tighten the harness. Measure the distance from the top of the baby’s head to the top of the hard plastic shell.
If it is less than one inch, the seat is outgrown.
Step 3: Check the harness slots. Make sure the straps are at or below the baby’s shoulders. If they are above, the seat is outgrown.
Step 4: Check the crotch buckle. Make sure the buckle sits flat against the baby’s crotch. It should not dig into the thighs. If it does, check if you can adjust the buckle position.
If not, the seat is outgrown.
Step 5: Check the tightness. Buckle the harness. Tighten it. You should not be able to pinch any webbing at the collarbone.
The chest clip should be at armpit level. If you cannot get a snug fit, the seat is outgrown.
Step 6: Check the expiration date. Look for the date on the side of the seat or the bottom. If it is expired, the seat is not safe to use.
If you fail any of these checks, stop using the seat. Switch to a convertible seat immediately. Do not use the infant seat even for a short trip.
If you pass all checks, the seat is still safe. But recheck every month. Babies grow fast.
A seat that fits today might not fit next week.
Expert Tips from a Child Passenger Safety Technician (CPST)
CPSTs see these mistakes every day. Here is what they wish every parent knew.
Tip 1: Recheck the seat when the baby gets a new winter coat. Bulky coats compress in a crash. They leave slack in the harness. Always remove the coat and tighten the harness over a thin layer.
Use a blanket over the top if needed.
Tip 2: Mark the 1-inch spot. Place a piece of tape on the shell at the 1-inch line. Then you can see at a glance if the baby’s head is getting close. No need to measure every time.
Tip 3: Do not skip the free inspection. Most communities have a CPST who will check your install. Search online for “car seat inspection near me.” The check is free and takes 20 minutes.
Tip 4: Keep the manual in the seat pocket. You will need it for installation and for checking limits. If you lose it, download a PDF from the manufacturer’s website.
Tip 5: Buy a convertible seat before you need it. Do not wait until the infant seat is outgrown. Have the convertible seat installed and ready. Then the transition is smooth.
Safety and Compliance – Labels, Expiration Dates, and Recalls
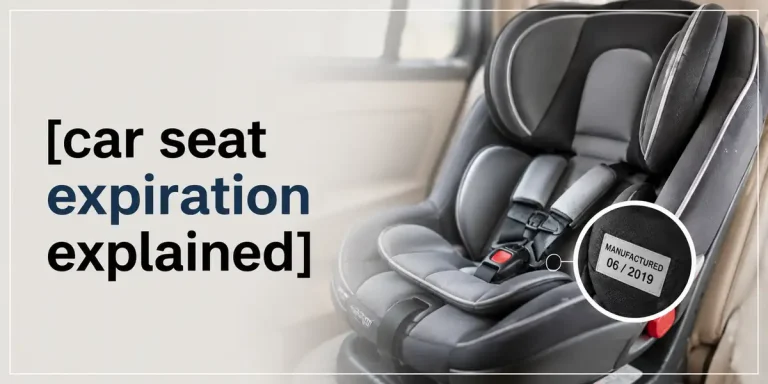
The label on your infant seat is the final authority. It lists the weight limit, height limit, and manufacture date. It also shows the model number and expiration date.
Expiration dates. Infant car seats expire 6 to 10 years from the date of manufacture. Do not use an expired seat. The plastic can become brittle.
The foam can lose its crash-absorbing ability. Check the sticker on the side or bottom of the seat.
Recalls. Check for recalls on your specific model. Go to the NHTSA website and enter the model number. If your seat is recalled, follow the manufacturer’s instructions.
Most recalls are free to fix.
Registered car seats are safer. Register your seat with the manufacturer. Then you will get recall notices. Most seats come with a registration card.
Fill it out and send it in.
Do not use seats with unknown history. Never buy a used car seat from a garage sale, thrift store, or online marketplace. You cannot know if it has been in a crash or if it is expired. Your baby’s safety is not worth the risk.
Frequently Asked Questions
What if my baby’s head is exactly one inch from the top?
One inch is the minimum. If you can just barely fit one finger, the seat is at its limit. Switch to a convertible seat as soon as possible.
Do not wait for the next growth spurt.
Can I use an infant car seat on a plane?
Most infant seats are FAA approved for aircraft use. Check the label. There should be a sticker that says “This restraint is certified for use in motor vehicles and aircraft.” If it is approved, you can use it on the plane.
But the seat must also fit the baby correctly. The 1-inch rule applies on planes too.
How do I clean the harness straps?
Do not soak the harness straps in water or use harsh cleaners. The webbing can weaken. Spot clean with a damp cloth and mild soap.
Let them air dry fully. Never machine wash or dry the straps.
My baby is 3 months old and already hitting the height limit. Is that normal?
Yes. Some babies grow fast and outgrow the seat early. It is normal.
The seat is not defective. Your baby is just tall. Move to a convertible seat that rear-faces to higher limits.
Do I need a convertible seat for a second baby?
Not necessarily. If your first baby outgrew the infant seat, you can buy a new infant seat for the second baby. But many families switch directly to a convertible seat from birth.
It saves money and keeps the baby rear-facing longer.
Final Verdict: When to Make the Switch
You should switch the moment your baby fails any of the checks. Head clearance under 1 inch. Weight or height at the limit.
Harness straps above the shoulders. Crotch buckle digging in.
Do not wait. Do not use the seat for one more trip.
A convertible seat is the next step. It rear-faces to higher limits and keeps your child safe for years. The switch is simple.
The safety benefit is huge.
If you are unsure, get a free inspection from a CPST. They will confirm the fit and give you peace of mind.
Your baby’s safety depends on getting this right. You have everything you need to make the call. Trust the rules.
Make the switch on time.