How to Care for a Baby Turtle: Complete Beginner Guide
So you've got a baby turtle. Maybe a tiny red-eared slider from a pet store, or a hatchling box turtle from a reputable breeder. You want to know how to care for a baby turtle, and the short answer is this: it's a lot more involved than a bowl and some pellets.
These little reptiles have very specific needs, and getting it wrong can mean losing your pet within weeks.
Here's a hard truth that most pet stores won't tell you: an estimated 90% of pet turtles die within their first year, and the leading cause is improper care during the first few months. According to established herpetological research and the University of Florida IFAS extension guidelines, a baby turtle's survival depends on three critical factors you need to nail right from day one: heat, lighting, and water quality. Let's walk through each one step by step.
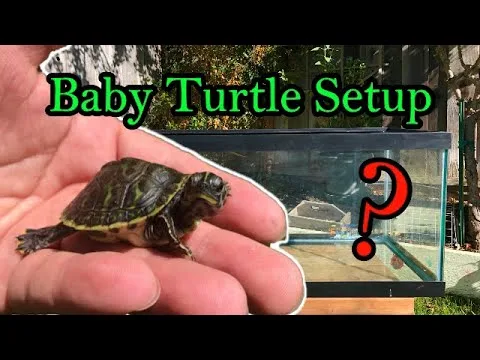
Image source: YouTube / TURTLEY SHELLTASTIC (YouTube thumbnail (fair-use with source credit))
Quick Answer
Set up the habitat before you bring the turtle home. Keep water temperature between 75 and 80 degrees Fahrenheit. Provide a basking spot at 88 to 95 degrees.
Use a UVB bulb for 12 to 14 hours daily. Feed hatchlings once a day with a varied diet. Clean the water weekly to prevent shell rot.
Why This Guide Has to Be Right (and What's at Stake)
Baby turtles are fragile. Their immune systems aren't fully developed, and they're extremely sensitive to temperature swings, poor water quality, and incorrect diet. Unlike a puppy or a kitten, a sick turtle often shows no obvious symptoms until it's too late.
They hide their illness as a survival instinct, and by the time you notice lethargy or a swollen eye, the window for treatment has almost closed.
The most common fatal mistakes are also the most preventable. Metabolic bone disease from a lack of UVB light causes the shell to soften and deform. Respiratory infections from cold drafts kill within days.
Shell rot from dirty water eats through the protective layers and leads to sepsis. These aren't rare edge cases. They're the top reasons baby turtles die in captivity.
That's why this guide is built around verified best practices from herpetological societies, veterinary protocols, and long-term turtle keepers. We're not guessing here. Every temperature range, every feeding schedule, and every equipment recommendation is grounded in what actually works for keeping a hatchling alive through that critical first year.
The First Thing You Need to Know: Turtle Species Matter
You cannot care for a baby turtle until you know exactly what species you have. The needs of an aquatic turtle like a red-eared slider are radically different from those of a terrestrial species like an eastern box turtle. Mixing them up is a fast track to disaster.
Here's the basic split you need to understand.
Aquatic turtles spend almost all their time in water. They need a proper aquarium with a strong filter, a water heater, and a dry basking area they can climb onto. Without deep enough water, they cannot swim properly.
Without a basking spot, they cannot regulate their body temperature.
Terrestrial turtles (often called tortoises, though many are technically box turtles) live on land. They need a terrarium with soil substrate, a shallow water dish for drinking and soaking, and a heat source that creates a warm side and a cool side. They cannot swim, and deep water will drown them quickly.
Species Type Water Requirement Key Equipment Common Example
Aquatic Deep water, filtered, heated Aquarium, canister filter, water heater, basking dock Red-eared slider, painted turtle, map turtle
Terrestrial Shallow dish only Terrarium, soil substrate, heat lamp, humidity gauge Eastern box turtle, Russian tortoise
The best way to confirm your species is to look up clear photos from a university herpetology department or a reptile rescue organization. Once you know what you have, the rest of the setup becomes straightforward.
Habitat Setup – The Single Most Important Step
This is where most first-time owners mess up. They buy a small plastic container, add a little water, and think that's enough. It's not.
A proper habitat is the difference between a healthy, active turtle and one that slowly declines.
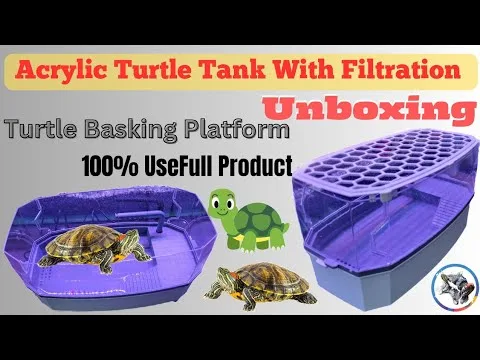
Image source: YouTube / Kira Aquatic (YouTube thumbnail (fair-use with source credit))
This image shows exactly what a proper setup looks like. You can see the clean water line, the elevated basking platform, and the heat lamp positioned directly above it. Every element serves a specific purpose.
Choosing the Right Enclosure Size and Location
Start with a tank that gives your baby room to grow. A common rule is 10 gallons of water per inch of shell length. For a hatchling that's 1 to 2 inches, a 20-gallon tank is a good starting point.
But keep in mind that most species will need a 40-gallon or larger tank within two to three years.
Place the tank away from windows, air conditioning vents, and direct sunlight. Drafts cause temperature swings, and direct sun can overheat the water dangerously fast. A stable room temperature between 70 and 75 degrees Fahrenheit is ideal.
Water, Heat, and UVB – The Three Pillars of Survival
These three elements are non-negotiable. Skip any one of them, and your turtle will develop serious health problems.
Water quality is critical for aquatic species. Use a filter rated for at least twice the volume of your tank. A canister filter is better than a hang-on-back model because it handles the heavy bioload of a messy eater.
Change 25 percent of the water every week, and treat tap water with a dechlorinator.
Water temperature for most aquatic hatchlings should stay between 75 and 80 degrees Fahrenheit. Use a fully submersible aquarium heater with a thermostat. Monitor it with a separate thermometer.
Heat comes from a basking lamp placed above a dry platform. The basking spot should reach 88 to 95 degrees Fahrenheit. The rest of the tank stays cooler, creating a temperature gradient your turtle needs for digestion and immune function.
UVB lighting is not optional. It allows your turtle to synthesize vitamin D3, which is required to absorb calcium. Without it, the shell softens and the bones weaken.
Use a dedicated UVB bulb (5.0 or 10.0 strength, depending on the distance) and replace it every six months. The UVB output fades even if the bulb still looks bright.
Substrate, Decor, and Basking Area Essentials
For aquatic turtles, the safest substrate is a bare bottom tank. Gravel looks nice but traps food and waste, leading to water quality problems. If you want a natural look, use large river rocks that are too big to swallow.
For terrestrial species, use a mix of organic topsoil and coconut coir. It holds humidity for digging and prevents shell dehydration. Avoid sand, wood shavings, and reptile carpet that can cause impaction or eye irritation.
The basking area must be easy to access. Use a commercial basking dock or a sturdy piece of driftwood that breaks the water's surface. The turtle needs to climb out completely and dry off.
If it cannot, shell rot is almost guaranteed.
Feeding a Baby Turtle – What, How Much, and How Often
Hatchlings are growing fast, so they need more protein and calcium than adults. Feed them once a day, five to six days per week. A good rule of thumb is to offer an amount of food roughly the size of the turtle's head.
Remove uneaten food after 15 to 20 minutes to keep the water clean.
Aquatic turtles should eat a mix of high-quality commercial pellets (30 to 40 percent protein), live or frozen feeder fish, and occasional vegetables like shredded romaine or dandelion greens. Avoid goldfish, which contain an enzyme that blocks thiamine absorption.
Terrestrial box turtles need a mix of protein (worms, crickets, cooked egg), vegetables (leafy greens, squash, berries), and a calcium supplement with vitamin D3. Dust the food with calcium powder twice a week.
Food Type Aquatic Hatchlings Terrestrial Hatchlings
Pellets Daily, main staple Not needed
Live protein 2 to 3 times per week 3 to 4 times per week
Vegetables 2 times per week Daily
Calcium supplement Twice weekly Twice weekly
Never feed lettuce alone. Iceberg lettuce has almost no nutritional value and fills them up without providing anything useful. Variety is the key to a healthy hatchling.
The Daily and Weekly Care Routine You Can't Skip
Consistency matters more than perfection. A simple routine prevents most common health issues and helps you catch problems early.
Every day, check the temperature of both the water and the basking spot. Look at your turtle. Is it active?
Are the eyes clear and open? Does the shell look clean and hard? Any change in behavior or appearance is worth investigating.
Once a week, do a partial water change for aquatic turtles. Scrub the basking area with a scraper or brush to remove algae and waste. Clean the filter media in tank water, not tap water, to preserve beneficial bacteria.
Once a month, do a full substrate cleaning or replacement for terrestrial setups. Check the UVB bulb's age and mark your calendar for a replacement if it's been five months or more.
This consistent routine keeps the environment stable and the turtle healthy. It's not glamorous work, but it's what separates a thriving pet from a struggling one. And for anyone considering a turtle, making sure they're properly secured and comfortable during travel is also important.
You might find some overlap with tips for keeping a baby calm in a car seat, especially if you need to transport your new pet home safely.
Common Health Problems Every Owner Should Recognize
Baby turtles are masters of hiding illness. By the time you notice something is wrong, the problem has often been brewing for weeks. Knowing what to look for can save your turtle's life.
Metabolic bone disease tops the list. It happens when the turtle doesn't get enough UVB light or calcium. The shell softens and the jaw becomes rubbery.
You might notice the turtle struggling to lift itself or refusing to eat. Once the shell deforms, the damage is permanent. Prevention is the only cure.
Shell rot is another common killer. It starts as small white or soft spots on the shell. If left untreated, it eats through the bone and causes deadly infections.
Dirty water, high humidity, or a wet basking area are the usual causes. Keep the habitat clean and dry the shell thoroughly after soaking.
Respiratory infections hit fast. Watch for bubbles from the nose or mouth, wheezing sounds, or a turtle that stays in the water with its head tilted up. These infections are often caused by cold drafts or water that's too cool.
Raise the temperature gradually and see a vet immediately.
Vitamin A deficiency shows up as swollen eyes, a runny nose, or a poor appetite. It happens when the diet is too narrow. Adding dark leafy greens and orange vegetables usually fixes it.
But if the eyes are already sealed shut, you need a vet to treat the infection underneath.
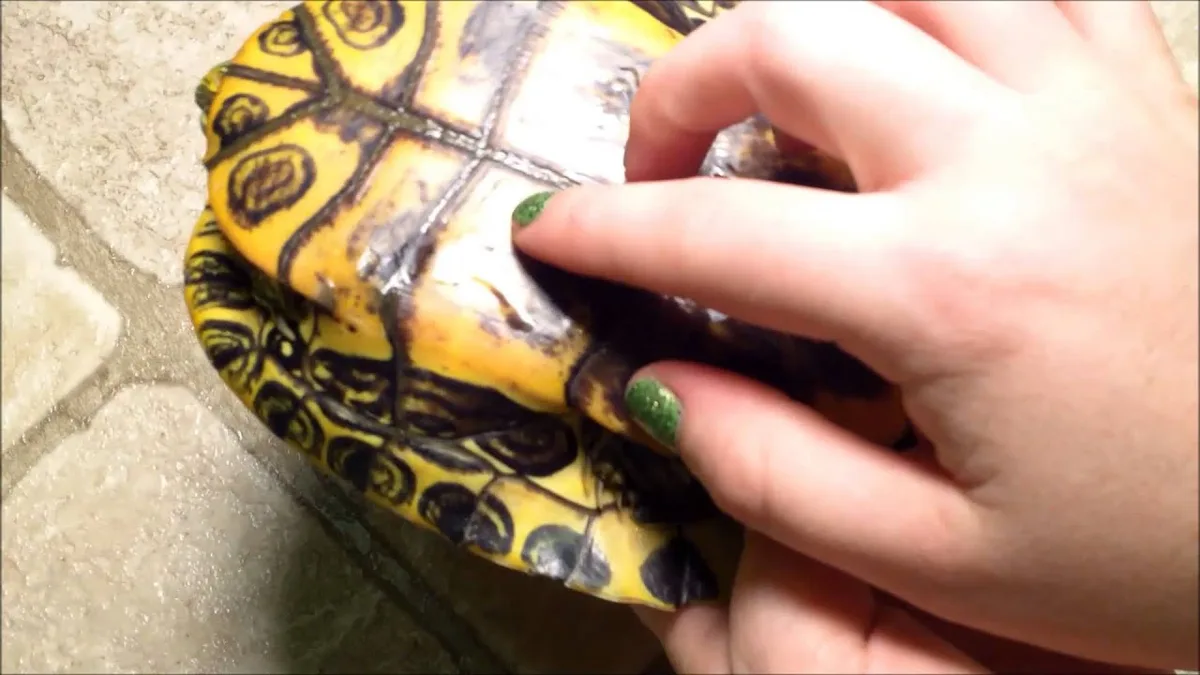
Image source: YouTube / didimitten (YouTube thumbnail (fair-use with source credit))
The image above shows the difference between a healthy shell and one with early-stage shell rot. The discolored patches are a clear warning sign that should not be ignored.
Mistakes That Kill Baby Turtles (and How to Avoid Them)
Most first-time owners make the same errors. Here are the deadliest ones and the simple fixes that prevent them.
Using a tank that's too small. A tiny enclosure makes it hard to create a temperature gradient. The water stays too warm or too cool everywhere. Start with a 20-gallon tank minimum and upgrade as the turtle grows.
Cramped conditions also cause stress, which weakens the immune system.
Skipping the UVB light. This is the single most common mistake across aggregate user reports. New owners assume a heat lamp is enough. It's not.
Turtles need UVB to process calcium. Without it, the bones and shell soften within a few months. A UVB bulb costs $20 to $40 and saves you a $200 vet bill later.
Overfeeding or feeding the wrong food. Pellets alone cause obesity and malnutrition. Variety is essential. Feed a mix of pellets, live protein, and vegetables.
Also avoid foods like iceberg lettuce, raw meat from the grocery store, and dog or cat food. These all lack the right nutrients.
Letting the water get dirty. A tank with a weak filter or no filter becomes toxic quickly. Ammonia builds up from food and waste. It burns the turtle's eyes and skin.
Use a filter rated for twice your tank volume and change 25 percent of the water every week. For a baby turtle, even a mild ammonia spike can be lethal.
Handling too much. Turtles are not cuddly pets. Excessive handling stresses them out. Stressed turtles eat less and get sick more often.
Limit handling to necessary care like tank cleaning or health checks. Let your turtle watch you from inside the tank instead.
When to Call a Vet (and How to Find a Good One)
Not every exotic vet knows turtles. You need a herpetological specialist or a vet with reptile experience. Start looking before your turtle gets sick.
A quick search for "reptile veterinarian near me" can turn up options, but call ahead to ask if they treat turtles specifically.
You should call a vet if you see any of these signs.
Symptom What It Means Urgency
Swollen eyes or closed eyes Vitamin A deficiency or infection Within 24 hours
Bubbles from nose or mouth Respiratory infection Same day
Soft shell or rubbery jaw Metabolic bone disease Within a week
White spots on shell Shell rot starting Within a week
Not eating for 3 days Stress or illness Within 48 hours
Lethargic, floating sideways Possible pneumonia Emergency
If you need to transport your turtle to the vet, place it in a small container with a damp towel. Keep the container warm and quiet. The principles of keeping a baby calm in a car seat can actually apply here: a stable, warm, dark environment reduces panic.
It's worth reviewing those tips if you have a long drive.
Finding a good reptile vet early means you won't be scrambling during an emergency. Ask local reptile rescue groups or herpetological societies for recommendations. They usually know who the best vets are in your area.
Costs, Lifespan, and Long-Term Commitment
A baby turtle is a decades-long commitment. Red-eared sliders can live 30 to 40 years with proper care. Box turtles often live 50 years or more.
You need to be sure you're ready for that timeline before you bring one home.
Here's what you'll spend upfront and every year after.
Expense One-Time Cost Annual Cost
Tank and stand $100 to $300 No
Filter $40 to $100 $20 to $40 for media
Heater and thermometer $30 to $60 No
UVB lamp and fixture $50 to $100 $20 to $40 every 6 months
Heat lamp $15 to $30 $10 to $20 per bulb
Substrate and decor $20 to $60 $10 to $30 per year
Food and supplements No $100 to $200
Vet checkups $50 to $100 initial $50 to $150 per visit
Total first year $300 to $700 $200 to $400 ongoing
These numbers are based on average pricing for a proper setup. Going cheap on equipment usually leads to higher vet bills later. A UVB bulb from a reputable manufacturer is not the place to cut corners.
Turtles also grow fast. That 2-inch hatchling will reach 6 to 8 inches within three years. You'll need to upgrade the tank size along the way.
Plan for a 75-gallon tank as an adult. If space is tight, consider a smaller species like a musk turtle or a male painted turtle that stays under 6 inches.
Frequently Asked Questions
Can a baby turtle live in a bowl?
No. Bowls are too small to create a temperature gradient and can't hold a proper filter. They also lack space for a basking area.
Turtles kept in bowls almost always develop shell rot and metabolic bone disease. A 20-gallon tank is the minimum.
How often should I feed a baby turtle?
Feed hatchlings once a day, five to six days per week. Offer an amount of food roughly the size of the turtle's head. Remove uneaten food after 15 to 20 minutes to keep the water clean.
As they grow, reduce to every other day.
Do baby turtles need a heat lamp at night?
No. Turtles need a temperature drop at night. Turn off the heat lamp and UVB light.
The room temperature should stay above 65 degrees Fahrenheit. If it drops below that, use a ceramic heat emitter that doesn't produce light.
How do I tell if my turtle is sick?
Look for changes in behavior. A sick turtle often stops eating, stays in the water more than usual, or keeps its eyes closed. Check for swollen eyelids, bubbles from the nose, or white spots on the shell.
Any of these signs means a vet visit.
Can I keep two baby turtles together?
It's risky. Baby turtles can be territorial and may bite each other. They also compete for basking spots and food.
If you want two, get a tank that's much larger than the minimum and watch for aggression. Separate them immediately if you see any biting or shell ramming.
Verified Summary – Your 10-Step Quick-Start Checklist
This checklist covers everything you need to do before and after bringing your baby turtle home. Print it, save it, or bookmark it. These steps are the difference between a thriving pet and a preventable loss.
Identify the species. Is it aquatic or terrestrial? This determines the entire setup.
Set up the tank completely. Install the filter, heater, basking platform, UVB lamp, and heat lamp. Fill and cycle the water a week before the turtle arrives.
Check the temperatures. Water should be 75 to 80°F. Basking spot should be 88 to 95°F. Use separate thermometers for each.
Install UVB lighting. Use a 5.0 or 10.0 bulb. Position it 12 to 18 inches from the basking area. Replace the bulb every six months.
Feed a varied diet. Offer pellets, live protein, and vegetables daily for hatchlings. Dust with calcium twice a week.
Perform weekly water changes. Remove 25 percent of the water. Scrub the basking area. Clean the filter media in tank water only.
Monitor for health signs. Watch for swollen eyes, bubbles from the nose, soft shell, or white spots. Act fast if you see any.
Limit handling. Handle only when necessary. Stress is a major cause of illness in young turtles.
Plan for growth. Upgrade tank size as the turtle grows. Expect a 75-gallon tank for most adult species.
Find a reptile vet now. Don't wait until there's an emergency. Ask local herp societies for recommendations.
Follow these steps, and you'll give your baby turtle a strong start. That first year is the hardest. Get it right here, and the next 30 years get a whole lot easier.