How to Care for a Baby Chick (Beginner’s Guide)
You’re watching a day‑old chick wobble around in a cardboard box, and the big question hits you: how to care for a baby chick without accidentally harming it. It’s a fragile start, that tiny ball of fluff depends entirely on you for warmth, food, and safety. One wrong move, and things can go sideways fast.
In our research, the first 48 hours are the most critical. Per extension poultry guidelines, a chick that enters the brooder at the correct temperature (95°F at chick height) has a survival rate above 98% in the first week. Get it wrong, and that number drops sharply.
So let’s walk through exactly what you need to do, step by step, from setup to the first few days.
Quick Answer
Warm the brooder to 95°F before chicks arrive. Provide fresh starter feed and clean water. Teach them to drink by dipping each beak.
Watch for pasty butt daily. Lower heat by 5°F each week. Move chicks outside at 6, 8 weeks when fully feathered.
Why Getting Chick Care Right Matters From Day One
A baby chick is not a mini chicken. Its body can’t regulate temperature yet, its immune system is still developing, and it’s extremely vulnerable to drafts, dampness, and stress. That’s why the first two weeks are make‑or‑break.
Heat is life. Without a consistent warmth source, a chick will huddle, chirp loudly, and eventually die from hypothermia or smothering under its siblings. On the flip side, too much heat causes panting, lethargy, and dehydration.
Cleanliness is survival. Ammonia from wet bedding burns delicate lungs. Bacteria from dirty waterers cause deadly infections. These aren’t “nice to haves”, they’re non‑negotiable.
Having raised many flocks (and helped countless beginners through forums and local extension offices), I can tell you this: the people who lose chicks almost always lose them in the first week to preventable mistakes. You can avoid those mistakes with a little planning.
Let’s look at what every chick absolutely must have, in order of priority.
The 4 Critical Needs Every Baby Chick Has
Think of these as the pillars of chick health. Miss any one, and the whole structure wobbles.
- Heat, A steady warm zone (95°F first week) with a cooler area so the chick can self‑regulate.
- Food and water, Starter feed (20‑22% protein) and clean, shallow water. No grit needed for the first few days if they’re eating starter crumble.
- Safety, A brooder that’s draft‑free, predator‑proof, and high enough to prevent escapes.
- Clean bedding, Dry, non‑toxic material (pine shavings are the gold standard) changed before it gets wet or soiled.
Each of these is simple on its own, but together they form the backbone of any successful brooding setup. Now let’s get into the gear.
Brooder Setup Essentials: Heat, Space, and Bedding
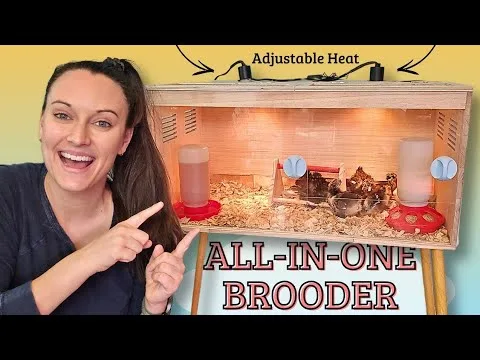
Your brooder is your chick’s entire world for the next 6‑8 weeks. It doesn’t need to be fancy, a plastic storage tote, a cardboard box with high walls, or a metal stock tank all work, but it must meet a few hard requirements.
Space: Each chick needs at least 0.5 square feet for the first two weeks, then 1 square foot per bird after that. For a flock of 10, that’s a 5‑square‑foot brooder initially, expanding to 10 square feet. Cramped quarters lead to pecking, stress, and disease.
Bedding: Pine shavings are the top choice. Avoid cedar shavings (the oils can damage a chick’s respiratory system) and newspaper (too slippery, causing spraddle leg). Change the bedding every 2, 3 days, or daily if it’s wet.
A dry chick is a healthy chick.
Heat source: This is where most beginners stumble. You have two main options, let’s compare them quickly.
| Feature | Heat Lamp (250W red bulb) | Heat Plate (e.g., Brinsea EcoGlow) |
|---|---|---|
| Fire risk | High – can cause barn fires if not secured | Very low – surface stays warm, not hot |
| Temperature control | Manual – adjust height to change temp | Built‑in – plate stays at optimal temp |
| Cost | $10‑20 (bulb + fixture) | $60‑100 |
| Best for | Large flocks, low budgets | Small flocks, safety‑focused keepers |
Temperature guidelines (first 8 weeks): Place a thermometer at chick height (2 inches above the bedding). Aim for these readings:
- Week 1: 95°F
- Week 2: 90°F
- Week 3: 85°F
- Week 4: 80°F
- Week 5: 75°F
- Week 6 onward: room temperature (or outside if weather allows)
If chicks are huddled directly under the lamp, they’re too cold. If they’re panting with wings spread in the far corner, they’re too hot. A good spread across the brooder means the temperature gradient is just right.
Feed and Water: What Chicks Need and When
Starter feed is non‑negotiable for the first 6‑8 weeks. It comes in two varieties:
- Medicated, Contains amprolium, which helps prevent coccidiosis (a common gut parasite). Safe for most flocks.
- Unmedicated, No additives. Use if you’re raising organic or if your chicks are already vaccinated against coccidiosis.
Choose based on your situation. If you’re unsure, medicated is the safer bet for backyard flocks.
How much to feed: Provide a constant supply. Chicks eat small amounts frequently. A 10‑chick flock will go through about 1‑2 pounds of feed per day by week two.
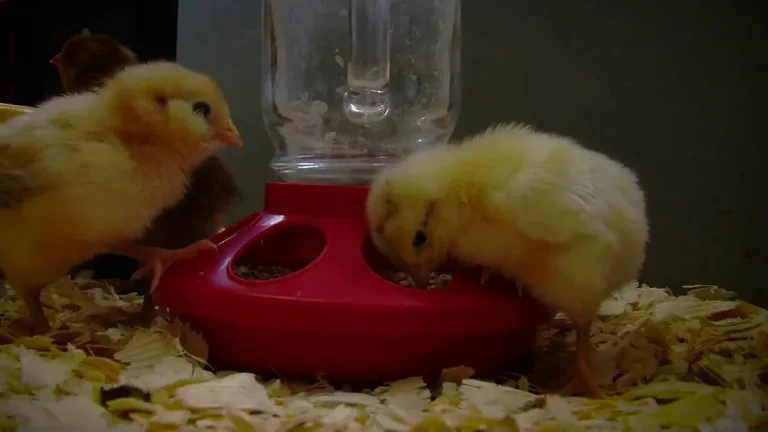
Water: The biggest rookie mistake, drowning. Open bowls are deadly. Use a chick‑specific waterer with a narrow rim.
Or a mason jar base with a shallow trough. Keep the water clean and refill daily.
Teaching them to drink: The first day, dip each chick’s beak gently into the water. Once one or two figure it out, the rest will follow. Make sure the water is room temperature, not cold.
Grit: Starter crumble is already digestible. You don’t need grit until you introduce treats like greens or scratch grains, around week 3 or 4.
The First 48 Hours: How to Help Chicks Settle In
Day one sets the tone for the entire brooding period. Here’s exactly what to do:
Before the chicks arrive:
- Pre‑heat the brooder to 95°F at least 2 hours beforehand.
- Fill feeder and waterer.
- Put a thin layer of paper towels over the bedding for the first 24 hours (helps chicks find feed), then remove it.
When they arrive:
- Gently lift each chick from the shipping box.
- Dip each beak in the waterer (one at a time).
- Place them under the heat source.
- Show them the feeder by tapping your finger in the feed.
Watch for these signs:
- Chirping loudly, too cold or stressed.
- Sleeping under the lamp, normal, but if they never leave, check temp.
- Pasty butt, check vents after the first feeding. If manure is stuck, clean it gently with a warm, damp cloth. Can kill in hours.
Do not handle them excessively in the first 48 hours. They need rest to recover from shipping. Just observe from outside the brooder.
Feeding and lighting schedule for the first week:
- Keep the light on 24 hours a day for the first 48‑72 hours to help them find food and water.
- After that, provide 16‑18 hours of light per day (a simple timer works).
- Chicks need darkness to sleep, turn lights off at night after day three.
If you follow this routine, your chicks will settle in quickly and start growing like weeds. The first two days are the hardest. After that, it’s mostly maintenance and gentle temperature adjustments.
In the next sections, we’ll cover the daily care routine for weeks two through six, how to spot and treat common health issues, and when it’s safe to move them outside. But for now, focus on getting the first 48 hours right, that’s the foundation everything else builds on.
Daily Care Routine for the First Two Weeks
Consistency is everything in these early days. A quick 10‑minute check twice a day will catch problems before they become emergencies.
Morning check:
- Look at the thermometer. Is it still 95°F at chick height?
- Refill the waterer with fresh room‑temperature water.
- Top off the feeder. Chicks eat constantly.
- Scan the bedding. Any wet spots? Change them immediately.
- Check each chick’s vent for pasty butt. Do this while they’re eating, they’re still then.
Evening check:
- Repeat the temperature reading.
- Make sure the heat source is secure and nothing has shifted.
- Remove any wet or soiled bedding.
- Listen. Loud, distressed chirping means something is wrong. Quiet, soft peeping means they’re content.
Every other day:
- Change all bedding. Don’t wait for it to smell. Ammonia builds up fast.
- Wash the waterer with hot water and a mild vinegar rinse. Soap residue can harm chicks.
- Wipe down the feeder if feed has caked on.
Week one specific tasks:
- Keep paper towels over the bedding for the first 24 hours, then remove them.
- After day three, introduce a 6‑8 hour dark period at night. Chicks need sleep to develop properly.
- Raise the heat lamp or heat plate by a few inches every 7 days to drop the temperature by 5°F.
Week two specific tasks:
- By day 10, most chicks will be exploring the whole brooder. Make sure the cool side is truly cooler.
- Check for feather development. Pin feathers on the wings are a good sign.
- If you’re using a heat plate, your chicks will start moving away from it naturally. Let them.
One thing many beginners miss: observe your chicks for five minutes without moving. Watch how they interact. The pecking order starts early.
A little gentle pecking is normal. Constant bullying or feather pulling is not, it signals stress, crowding, or too much light.
Common Health Problems and How to Spot Them Early
Three conditions account for most chick losses in the first two weeks. Know them, and you’ll catch them before they turn fatal.

Pasty Butt
This is the #1 killer of day‑old chicks. Manure dries around the vent and seals it shut. The chick can’t poop, toxins build up, and death follows within 24‑48 hours.
What to look for: A small brown or yellow crusty ball stuck to the feathers under the tail. The chick may seem lethargic or stop eating.
What to do: Gently soak the area with a warm, damp cloth. Do not pull the crust off, it can tear the skin. Let it soften, then wipe it away.
Apply a tiny dab of coconut oil or olive oil to prevent reoccurrence. Check every chick once a day for the first week.
Prevention: Keep the brooder temperature steady. Temperature swings cause stress, and stress causes pasty butt. Also, avoid feeding medicated feed to chicks that are already stressed, it can sometimes worsen the issue.
Spraddle Leg
This is a leg deformity where the chick’s legs slide out to the sides, making it unable to stand or walk. It’s not a disease, it’s a mechanical problem caused by slippery surfaces.
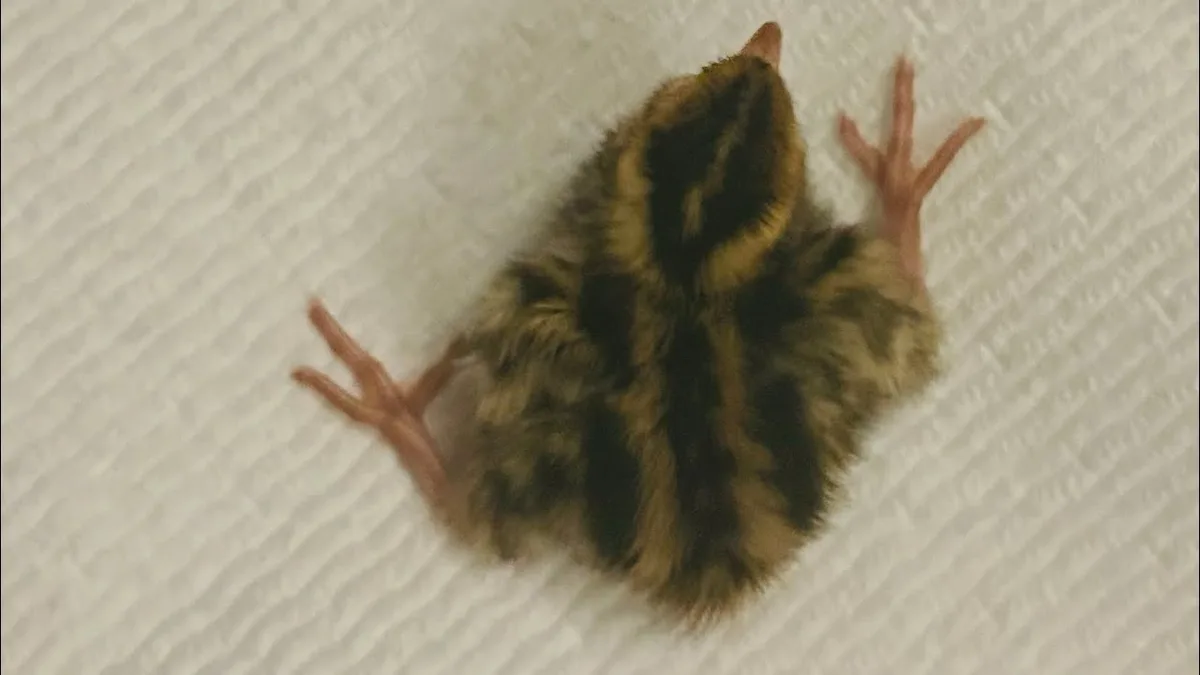
What to look for: A chick lying flat on its belly, legs splayed out like a starfish. It may flap its wings but can’t push itself upright.
What to do: Create a tiny “hobble” from a piece of adhesive bandage or Vetrap. Place the chick’s legs at the correct width (hip width apart) and wrap the bandage around both legs loosely. Leave it on for 24‑48 hours.
The chick will usually recover fully. Remove the hobble and monitor for another day.
Prevention: Never use newspaper, cardboard, or smooth plastic as bedding for the first week. Paper towels are fine for the first 24 hours. After that, switch to pine shavings.
The texture gives chicks traction.
Coccidiosis Warning Signs
This is a parasitic infection that affects the intestine. It’s common in chicks raised on damp bedding or in crowded conditions.
What to look for: Bloody droppings, lethargy, fluffed feathers, and a lack of appetite. The chick may huddle near the heat source even when it’s warm enough.
What to do: Isolate the affected chick immediately. Coccidiosis spreads fast. If you’re using medicated feed, it may not be enough, you may need a treatment like amprolium solution in the water (available at feed stores).
Clean the brooder thoroughly and dry it out. If more than one chick shows symptoms, treat the whole flock.
Prevention: Keep bedding dry. Don’t overcrowd. Use medicated starter feed if you’ve had coccidiosis issues before.
As of 2026, backyard flock owners report that clean, dry conditions prevent 90% of cases.
Mistakes That Can Kill Chicks Fast
Let’s be blunt about the errors that end badly. These are the ones I see in forum posts and local extension calls every spring.
Temperature swings. Chicks can’t regulate their own body heat. A drop of 10°F below the target can cause chilling and death within hours. A spike of 10°F above can cause heat stress and dehydration.
Check the thermometer twice a day, every day.
Open water dishes. A shallow bowl looks fine, but a chick that falls in and gets wet will chill and die in minutes. Use a chick‑specific waterer with a narrow drinking channel. No exceptions.
Wet bedding. This is the #1 cause of coccidiosis and respiratory infections. If the bedding is damp, change it immediately. Don’t wait for the next scheduled cleaning day.
Bright white light. White heat lamps make chicks restless and aggressive. They peck each other more. Use a red heat lamp bulb.
It’s calming and reduces cannibalism.
Crowding. Too many chicks in too small a space leads to stress, pecking, and disease. Stick to the 0.5 square feet per chick rule. If you’re raising meat birds (Cornish Cross), they grow fast and need even more space by week four.
Not preheating the brooder. Chicks arrive cold from shipping. If the brooder isn’t warm when they go in, they chill further. Preheat at least 2 hours before arrival, preferably 4 hours.
Forgetting to teach them to drink. Some chicks figure it out on their own. Many don’t. Dip each beak once.
It takes 30 seconds per chick and prevents dehydration deaths.
The Week‑by‑Week Checklist: From Brooder to Coop
This is your roadmap. Print it, tape it to the wall, and check off each week.
Week 1:
- Temperature: 95°F at chick height.
- Bedding: Change every 2 days. Keep dry.
- Feed: Starter crumble, 20‑22% protein.
- Water: Clean daily. Dip beaks on day one.
- Health: Check vents for pasty butt every morning.
- Light: 24 hours for first 48 hours, then 16‑18 hours.
Week 2:
- Temperature: 90°F.
- Bedding: Change every 2‑3 days.
- Feed: Same starter feed.
- Water: Same routine.
- Health: Watch for spraddle leg. Check for any respiratory sounds.
- Light: 16‑18 hours. Turn off completely at night.
Week 3:
- Temperature: 85°F.
- Bedding: Change every 3‑4 days. Chicks are bigger now and produce more waste.
- Feed: Starter feed. You can introduce small treats like chopped greens or scrambled egg (no salt).
- Grit: Offer a small dish of chick grit if you’re giving treats.
- Health: Look for feather development. Wing feathers should be visible.
Week 4:
- Temperature: 80°F.
- Space: If chicks seem cramped, expand the brooder.
- Feed: Continue starter.
- Health: Check for any signs of pecking order injuries. Separate any bullied chick.
Week 5:
- Temperature: 75°F.
- Bedding: Change weekly now.
- Feed: Still on starter. At week 6, you can switch to grower feed (18‑20% protein) for meat birds.
- Outdoor time: On warm, calm days (above 65°F), let them spend an hour in a secure outdoor pen or supervised run.
Week 6:
- Temperature: 70°F. If room temperature is above 70°F, you can turn off the heat during the day.
- Feed: Switch to grower feed for meat birds. Layers stay on starter until week 8.
- Coop prep: Start getting the coop ready. Clean it, add bedding, check for drafts.
Week 7:
- Temperature: 65°F. Heat can be off completely if the brooder is indoors.
- Outdoor time: Increase to several hours a day, weather permitting.
- Coop transition: Move the brooder closer to the coop so chicks get used to the new location.
Week 8:
- Feathering: Most breeds are fully feathered now. Check for bald patches or pin feathers on the head and neck.
- Move to coop: On a warm, dry day, move them to the coop. Keep a heat source in the coop for the first few nights if temperatures drop below 50°F.
- Integration: If you have older birds, separate them with a wire divider for a week. Let the chicks see and smell the adults without being attacked.
Safety and Fire Prevention Around the Brooder
This is the part nobody wants to think about, but it’s the most important. Heat lamps are a leading cause of barn fires. A 250‑watt bulb gets hot enough to ignite dry bedding, dust, or wood in seconds.
Secure the lamp. Never hang a heat lamp with just the cord or a zip tie. Use a chain or a heavy‑duty clamp rated for the lamp’s weight. Secure it to a solid beam or bracket.
A lamp that falls into the bedding is a fire.
Keep a clear zone. Remove any flammable materials within 3 feet of the lamp. That includes cardboard, hay, feed bags, and plastic bins.
Inspect the bulb. Check for cracks or damage every time you clean the brooder. A cracked bulb can shatter, sending hot glass into the bedding.
Use a red bulb. Red glass bulbs are tougher than clear ones. They also produce less glare and are less likely to shatter from a splash of water.
Ventilation. Heat lamps can raise the temperature in a small room dangerously high. Make sure the brooder area has some airflow. A small crack in a window or a fan on low (pointed away from the chicks) keeps the air fresh.
Smoke detector. Place a smoke detector near the brooder area. It’s a cheap investment that can save your flock and your home.
Alternative: heat plates. If fire risk worries you, switch to a heat plate. They run at a lower surface temperature and don’t create a fire hazard. They cost more upfront, but they’re safer and use less electricity.
For a small flock of 6‑10 chicks, it’s the better choice.
Final safety note: Never use Teflon or non‑stick cookware near the brooder. When heated, these coatings release fumes that are deadly to birds. That includes self‑cleaning ovens, non‑stick frying pans, and space heaters with non‑stick coatings.
If you cook in the same room, keep the birds far away.
When to Call a Vet or a Seasoned Flock Owner
Most chick problems you can handle at home. But some situations need a professional.
Call a vet if: A chick has bloody diarrhea that doesn’t improve after 24 hours of treatment. Or if multiple chicks die suddenly with no obvious cause. A necropsy (animal autopsy) can identify the disease and save the rest of your flock.
Call a seasoned flock owner if: You notice a chick that’s lethargic but not showing clear symptoms. Or if you’re unsure about a treatment dose. Experienced keepers can often diagnose issues over a phone call or a photo.
Local poultry clubs and extension offices are good resources.
Keep these numbers handy: Your local veterinarian’s number, a nearby university extension poultry specialist, and an experienced neighbor who keeps chickens. You will not need them often. But when you do, you will be glad you have them.
Quick Reference: Temperature, Feed, and Space Chart
| Week | Temperature | Space per Chick | Feed Type | Water Notes |
|---|---|---|---|---|
| 1 | 95°F | 0.5 sq ft | Starter crumble (20-22% protein) | Dip beaks on day one |
| 2 | 90°F | 0.5 sq ft | Starter crumble | Clean daily |
| 3 | 85°F | 0.75 sq ft | Starter crumble + treats + grit | Clean daily |
| 4 | 80°F | 1 sq ft | Starter crumble | Check for droppings in water |
| 5 | 75°F | 1 sq ft | Starter crumble | Outdoor time if warm |
| 6 | 70°F | 1.5 sq ft | Grower feed (meat birds) or starter (layers) | Coop prep |
| 7 | 65°F | 1.5 sq ft | Grower or starter | Increase outdoor time |
| 8 | Room temp | 2 sq ft | Grower feed (all birds) | Move to coop |
Frequently Asked Questions
How cold is too cold for a week-old chick?
A week-old chick cannot survive below 85°F. If the brooder drops below that, they will huddle, stop eating, and die within hours. Always keep a thermometer at chick height and check it twice daily.
Can I use a regular light bulb instead of a heat lamp?
No. Regular bulbs don’t produce enough heat. A 60-watt bulb won’t warm a brooder to 95°F.
You need a 250-watt infrared heat lamp or a dedicated heat plate designed for poultry brooding.
How do I know if my chick is happy?
Happy chicks make soft, contented peeping sounds. They spread out across the brooder, eat regularly, and sleep in loose groups. Stressed chicks chirp loudly and constantly, huddle together, or pant with open beaks.
What do I do with a chick that won’t eat?
First, check the temperature. A cold chick won’t eat. Warm it under the heat source for 30 minutes, then offer feed by tapping your finger in it.
If it still refuses, try dipping its beak in water mixed with a pinch of sugar or electrolyte powder.
When can chicks go outside without heat?
Chicks can go outside without supplemental heat when they are fully feathered and nighttime temperatures stay above 50°F. For most breeds, that happens around 6 to 8 weeks old. Always provide a sheltered coop with dry bedding for their first few nights outdoors.
Should I vaccinate my chicks?
Vaccination depends on your flock’s history and local disease risks. Marek’s disease and coccidiosis are common. Hatchery chicks often come vaccinated.
If you buy unvaccinated chicks, talk to your extension office about whether vaccination makes sense in your area.