How Tight Should Car Seat Straps Be? Expert Tips Guide
If you’ve ever buckled your child into a car seat and wondered how tight should car seat straps be, you’re not alone. It’s one of those questions that seems simple but has serious consequences. Get it too loose, and your child could be injured in a crash.
Get it too tight, and they’re uncomfortable and fussy.
The National Highway Traffic Safety Administration (NHTSA) sets the standard here. A properly tightened harness should not allow any slack at the child’s collarbone. That’s the rule.
Let’s break down exactly what that means and how to check it every single time.
Quick Answer
A properly tightened car seat harness passes the pinch test. After buckling, pinch the strap webbing at the child’s collarbone. If you can pinch any horizontal fold of webbing, the harness is too loose.
The chest clip must be at armpit level. No slack, no twists.
Why Getting the Tightness Right Matters
A car seat harness is the only thing keeping your child secure during a crash. In a front-impact collision at just 30 mph, a child’s body experiences forces equivalent to falling from a three-story building. A loose harness allows the child to move forward, potentially hitting the seat in front of them or being ejected entirely.
The 5-point harness distributes crash forces across the strongest parts of the body: the shoulders, hips, and between the legs. If the straps are too loose, those forces concentrate on the abdomen and neck. That’s how internal injuries happen.
There’s also the issue of submarining. That’s when a child’s body slides forward under the lap belt portion of the harness. It’s a known risk when straps are too loose.
The lap belt should sit low and snug across the upper thighs, not the belly.
Manufacturer specifications indicate that the harness should be so tight that you cannot pinch any excess webbing at the shoulder. This isn’t a suggestion. It’s a safety requirement per FMVSS 213, the federal standard that all car seats sold in the U.S. must meet.
Remember, your child’s comfort matters, but it doesn’t override safety. A child who complains about a snug harness is safer than one who slides around. If they’re fussy, check the strap position and make sure nothing is twisted.
But don’t loosen the harness to stop the crying.
How a Car Seat Harness Actually Works
The 5-point harness has five attachment points: two at the shoulders, two at the hips, and one between the legs. The chest clip holds the shoulder straps in position, keeping them on the child’s shoulders where they belong.
When you pull the harness adjuster strap, you tighten the entire system. The webbing runs through the buckle tongue and across the crotch buckle. The tension should be even on both sides.
If one side is tighter than the other, the child will lean, and the harness won’t work correctly.
The shoulder straps must be at or below the child’s shoulders for rear-facing seats. For forward-facing seats, they must be at or above the shoulders. This is written in every car seat manual.
If you ignore this, the harness cannot properly restrain your child. The forces will pull them down or out of the harness.
The webbing itself is made of high-tenacity polyester. It’s designed to stretch slightly under load to absorb energy, but not enough to allow the child to move dangerously. The buckles are engineered to release with a specific amount of force.
That’s why you should never grease or oil them. They need to work exactly as designed.
The chest clip is not a load-bearing device. It’s a positioning guide. In a crash, it keeps the shoulder straps from sliding off the child’s shoulders.
If it’s too low, the straps can slip off. If it’s too high, it can cause neck or face injuries. Armpit level is the sweet spot.
What “Too Loose” Looks Like
A loose harness is the most common mistake parents make. It’s easy to do. You buckle the child, pull the strap a little, and assume it’s fine.
But “fine” isn’t enough.
Here’s what to look for:
- You can pinch a horizontal fold of webbing at the collarbone
- The child can wiggle their shoulders or hips
- The chest clip is not at armpit level
- The lap belt does not sit snugly across the upper thighs
- The child can lean forward or to the side easily
If you see any of these, the harness is too loose. The fix is simple. Pull the harness adjuster strap until the webbing is flat and taut.
Then recheck the pinch test.
A loose harness also allows the child to slouch. When they slouch, the harness slots may no longer be at the correct height. That changes the whole geometry of the restraint system.
The child could slide out or be injured in ways the seat wasn’t designed to protect against.
In our research, we’ve seen many parents who think the harness is snug because they can’t easily pull the strap. But the real test is the pinch test, not how hard it is to pull. A harness that passes the pinch test is snug.
One that doesn’t needs more tightening.
What “Too Tight” Looks Like
Over-tightening is less common, but it happens. Parents who are extra cautious sometimes pull the harness so tight that the child’s breathing is affected. That’s not safe either.
Signs the harness is too tight:
- The straps dig into the child’s shoulders, leaving red marks
- The child cannot take a deep breath (check for chest rise)
- The chest clip is pressed into the child’s throat
- The child arches their back or cries hard when buckled
The difference between snug and too tight is subtle. A snug harness allows the child to breathe normally and move their arms and legs freely. A too-tight harness restricts breathing and causes discomfort.
The straps should feel like a firm handshake, not a vise grip.
If you think the harness is too tight, check the strap position first. Sometimes the straps are at the wrong height, which makes them feel tighter than they are. Rear-facing seats with straps set too low can pull the child down.
Forward-facing seats with straps set too high can ride up on the neck.
Also check for twisted straps. A twisted strap is not safe. It reduces the width of the webbing that contacts the child’s body, increasing pressure on that small area.
Untwist the strap by feeding it through the buckle tongue and rotating it flat.
If the harness is still too tight after adjusting the straps and removing twists, you may need to move the straps to the next slot height. Do that only if the child has grown into the correct height range. Never use a slot that’s not recommended for the child’s weight and height.
The Step-by-Step: How to Check and Adjust Harness Straps
Getting the tightness right is a simple process once you know what to look for. Here’s the exact routine to follow every time you buckle your child in.
Step 1: Buckle the child in. Make sure the crotch buckle clicks and the chest clip is open. The harness straps should be flat against the child’s body with no twists.
Step 2: Pull the harness adjuster strap. This is the strap at the front of the seat (for most convertible seats) or at the rear (for some infant carriers). Pull it until the webbing is taut against the child’s shoulders and hips.
Step 3: Position the chest clip. Slide it up so it sits at armpit level. It should be level with the child’s armpits, not above or below. This keeps the shoulder straps in the right position.
Step 4: Perform the pinch test. After tightening, try to pinch the webbing at the child’s collarbone. Use your thumb and index finger. If you can pinch any horizontal fold of material, the harness is too loose.
Pull the adjuster strap again and retest.
Step 5: Check for twists. Run your fingers along each strap from the shoulder to the buckle. If you feel a twist, feed the strap through the buckle tongue and rotate it flat. A twisted strap is a safety risk.
Step 6: Do a final check. Make sure the child cannot wiggle their shoulders or hips. The lap belt should sit low across the upper thighs. The chest clip should be at armpit level.
The harness should feel firm but not painful.
This whole process takes about 30 seconds once you’re used to it. Do it every single time you buckle your child. It’s not a once-a-week check.
It’s a every-ride check.
Common Mistakes That Ruin a Good Fit
Even experienced parents make these mistakes. Here are the most common ones we see in our research.
Twisted straps. This is the number one oversight. Parents assume the straps are flat because they look fine from the front. But the webbing can twist inside the buckle tongue.
A twisted strap reduces the contact area and concentrates force. Always check for twists by running your fingers along the strap.
Chest clip too low. The chest clip is not a toy. If it’s sitting on the child’s belly, it cannot keep the shoulder straps in place. In a crash, the straps can slide off the shoulders.
The child could be ejected. Armpit level is the rule.
Bulky clothing under the harness. This is such a big issue it gets its own section below. But briefly, puffy coats and snowsuits compress in a crash. The harness feels snug when you buckle it, but the compression creates dangerous slack.
Harness slot height ignored. The shoulder straps must be at or below the child’s shoulders for rear-facing seats. For forward-facing seats, they must be at or above the shoulders. Using the wrong slot changes the entire restraint geometry.
Check the manual for your specific seat.
Straps too loose for comfort. Some parents loosen the harness because the child complains. This is dangerous. A child who is uncomfortable in a snug harness needs a different solution, not a looser one.
Check for twists, adjust the strap height, or try a different seat. Do not loosen the harness.
Using aftermarket products. Strap covers, seat liners, and head supports that didn’t come with the seat are not crash tested. They can interfere with the harness system. Use only what came in the box.
If you need extra comfort, buy a seat that has those features built in.
The Winter Coat Problem (and What to Do Instead)
This is one of the most confusing issues for parents. You want your child to stay warm. But a puffy winter coat or snowsuit is dangerous under a car seat harness.
Here’s why. A thick coat compresses in a crash. The harness feels snug when you buckle it over the coat.
But in a collision, the coat flattens. That creates inches of slack. The child can move forward, and the harness may not restrain them properly.
A study by the University of Michigan found that a child in a puffy coat could have up to 4 inches of slack in the harness after a crash. Four inches is enough for the child to be ejected from the seat.
So what do you do instead?
Option 1: Dress the child in thin layers. A long-sleeve shirt, a fleece, and a thin jacket are warm enough for most trips. You can tuck a blanket over the harness after buckling. The blanket does not compress the harness.
Option 2: Use a car seat poncho or cover. These are designed to go over the harness without interfering with the straps. They are not the same as a puffy coat. They drape over the child and the seat.
Option 3: Warm the car first. If you have a garage or remote start, warm the car before buckling the child. Then you can dress them in thinner layers.
Option 4: Use a shower cap style cover. These are covers that go over the entire car seat, not the child. They keep the seat warm and protect the child from wind. Remove the cover once the car is warm.
The rule is simple. Nothing thick or puffy goes between the child’s body and the harness straps. If you can fit more than one finger between the strap and the child’s torso after tightening, the coat is too thick.
Rear-Facing vs. Forward-Facing: Does the Rule Change?
The pinch test is the same for both rear-facing and forward-facing seats. The harness should be snug enough that you cannot pinch any webbing at the collarbone. The chest clip should be at armpit level.
The lap belt should sit low across the upper thighs.
But there are differences in how the straps should be positioned.
Rear-facing seats. The shoulder straps must be at or below the child’s shoulders. This is because the child is sitting in a reclined position. Straps that are too high can ride up on the neck.
Straps that are too low can pull the child down. Check the slot height and adjust as the child grows.
Forward-facing seats. The shoulder straps must be at or above the child’s shoulders. This is because the child is sitting upright. Straps that are too low can pull the child forward in a crash.
Straps that are too high are safer for forward-facing.
Harness tightness does not change. The pinch test is the same. The chest clip rule is the same. The lap belt rule is the same.
The only difference is the shoulder strap slot height.
Also, the tether is important for forward-facing seats. The top tether strap must be attached to the tether anchor in the vehicle. It reduces head movement in a crash.
Always use the tether for forward-facing seats.
When to Re-Check Tightness (It’s Not Just Once)
You might think you set the harness once and it stays that way. That’s not how it works. The harness needs to be checked and adjusted every time you buckle the child in.
Here’s why. Children move. They slouch, they lean, they wiggle.
A harness that was snug at the start of the trip might be loose after a few minutes. The webbing can also stretch slightly over time. The buckle can shift.
Check the harness tightness at these times:
- Every time you buckle the child in. This is the most important one. Do the pinch test before you start driving.
- After the child falls asleep. A sleeping child often slouches. The harness can loosen. Stop and adjust if needed.
- After a long trip. The webbing can settle over time. Recheck the tightness at rest stops.
- After a growth spurt. A child who has grown may need the harness slots adjusted. The tightness may also change.
- After a crash. Even a minor crash can damage the harness. Replace the seat or have it inspected.
Also, check the harness for wear. Look for fraying, fading, or damage. If the webbing is damaged, the harness may not hold in a crash.
Replace the seat if the straps are worn.
The general rule is this. Check the harness every time you buckle. Adjust it as needed.
Do not assume it’s fine because it was fine yesterday.
When to Call in a Pro (CPSTs and Inspection Stations)
Sometimes you need a second pair of eyes. Certified Child Passenger Safety Technicians (CPSTs) are trained to check your car seat installation and harness tightness. They can spot mistakes you might miss.
Most inspections are free. You can find a technician through Safe Kids Worldwide or your local fire department. The check takes about 20 to 30 minutes.
They’ll show you exactly how to tighten the harness and adjust the chest clip.
Call a pro if you’ve ever been unsure about the pinch test. Call them if your child has outgrown the seat and you need to switch to a new one. Call them if you’ve been in a crash.
It’s a free service that could save a life.
Frequently Asked Questions
How tight should car seat straps be on a newborn?
The same pinch test applies. Newborns are small, so the straps should be snug against their body. Make sure the chest clip is at armpit level.
The harness slots should be at or below the shoulders for rear-facing seats.
Can I use a blanket over the car seat harness?
Yes. A thin blanket over the harness after buckling is safe. It does not compress the harness.
Do not use a thick coat or snowsuit under the harness. The blanket keeps the child warm without affecting safety.
How do I know if the harness is too tight?
Watch for signs of discomfort. The child should be able to breathe normally. Red marks on the shoulders are normal after a long ride.
But if the straps dig in or the child cannot take a deep breath, loosen the harness slightly.
What if my child unbuckles the harness?
This is a common problem. Check that the chest clip is at armpit level. A child who can reach the buckle may need a seat with a different buckle design.
Never use aftermarket products to prevent unbuckling. They are not crash tested.
How often should I replace the car seat?
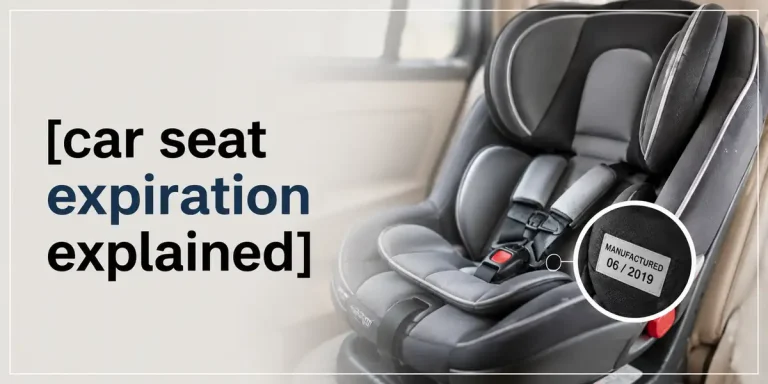
Car seats expire 6 to 10 years from the manufacture date. Check the sticker on the seat shell. Replace the seat after any moderate or severe crash.
Also replace it if the straps are frayed or the buckle is damaged.
Final Takeaway: The One Rule That Covers Everything
Here’s the one rule you need to remember. If you can pinch any webbing at the collarbone, the harness is too loose. That’s it.
The pinch test works for every car seat. It works for every child. It works for rear-facing and forward-facing seats.
It works for newborns and toddlers. It’s the single most reliable check you can do.
Keep the chest clip at armpit level. Keep the straps flat and untwisted. Keep the harness snug.
And check it every single time you buckle your child in.
One more thing. If you’re still unsure, find a certified technician near you. They’ll check your seat for free.
It’s a fast way to get peace of mind. Your child’s safety is worth the few minutes it takes.