How to Clean a Car Seat: Quick and Simple Cleaning Tips
Your car seat looks like it’s been through a war. Coffee rings, cracker crumbs, maybe a mystery stain you’re afraid to identify. If you’re wondering how to clean a car seat without ruining it, you’ve come to the right place.
The good news is that most stains come out quickly when you use the right approach.
Manufacturer specifications indicate that the vast majority of car seat fabrics are tested for cleaning with plain water and a mild detergent. As of 2026, the average car seat foam takes 12 to 24 hours to dry completely after a deep clean. That drying time is your biggest risk factor.
Let’s walk through the process step by step so you don’t end up with a wet seat that smells like a gym bag.
Quick Answer
Vacuum the seat first. Identify the material. For fabric, use a mild detergent and water.
Blot, don’t rub. For leather, use a pH-balanced cleaner. Condition after cleaning.
Let the seat dry completely before sitting on it.
My Car Seat Is Gross – Where Do I Even Start?
You’re looking at a mess and you don’t know what to grab first. That’s normal. The biggest mistake people make is grabbing the first cleaner they find under the sink and spraying it everywhere.
That’s how you get a sticky residue, a weird smell, or a stain that actually sets in deeper.
Start by taking a deep breath. Then take a good look at the seat. What’s the material?
What’s the stain? How old is it? Those three questions determine everything that follows.
Here’s a quick list of what you’re probably dealing with:
- Food and drink spills, coffee, soda, juice, chocolate
- Organic messes, vomit, urine, blood, sweat
- Grease and oil, sunscreen, makeup, body oils, butter
- Mud and dirt, kids, pets, hiking boots
- Unknown sticky spots, could be anything
Each of these needs a slightly different approach. But the first fork in the road is the seat material itself. That’s where we’ll go next.
The Five-Minute Rule: What Type of Seat Do You Have?
Before you apply anything to the seat, you need to know what you’re working with. This takes five minutes max. Look at the seat tag or the owner’s manual.
If the tag is gone, run your hand across the surface.
Here’s a quick comparison to help you decide:
| Material | Feel | Appearance | Common in |
|---|---|---|---|
| Fabric (cloth) | Soft, slightly porous, woven texture | Matte finish, visible fibers | Most mid-range cars, minivans, SUVs |
| Leather (genuine) | Smooth, warm to the touch, slight grain | Shiny or semi-gloss, natural patterns | Luxury cars, some higher trims |
| Synthetic leather (vinyl, leatherette, SofTex) | Smooth, cool at first, uniform texture | Consistent matte or satin finish | Economy cars, some high-end trims |
| Alcantara / suede | Soft, velvety, fuzzy feel | Slight nap, matte | Sports cars, premium interiors |
If you’re still unsure, try the water test. Put a drop of water on an inconspicuous spot. If it beads up, it’s likely coated or synthetic.
If it soaks in within a few seconds, it’s porous fabric. That single test will save you from a lot of trouble.
The First Decision: Fabric or Leather?
Spot the Difference in 10 Seconds
You don’t need a degree in materials science to figure this out. Press your palm against the seat for five seconds. Then lift your hand.
Fabric leaves a faint warmth and a slightly rough texture. Leather feels smooth and cool, and it warms up slower. Synthetic leather often feels like a cross between plastic and rubber.
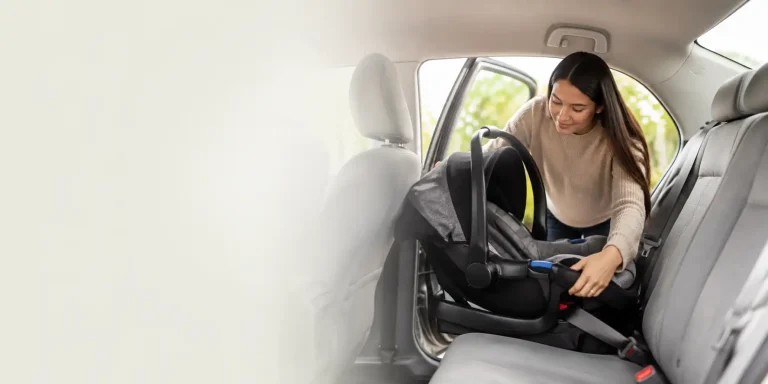
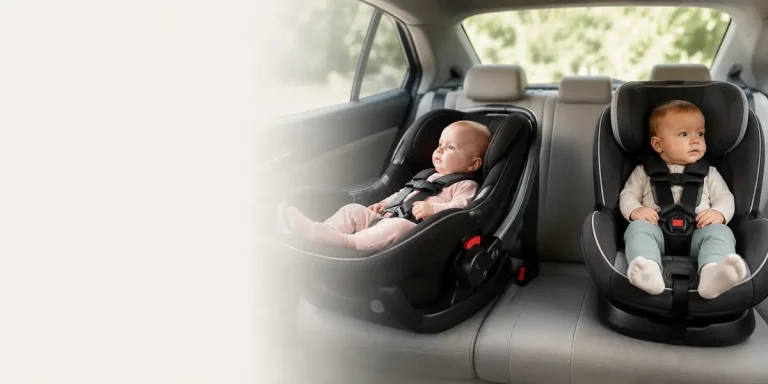
If you’ve got a baby car seat in the back, that’s almost always fabric. The same goes for most booster seats. For a closer look at how to keep your infant comfortable on the road, you might want to check out our guide on keeping your little one settled during car rides.
That’s a different challenge, but the cleaning basics apply.
Why This Choice Changes Everything
Fabric is porous. It absorbs liquid like a sponge. That means you need to extract the dirt and moisture, not just wipe it off the surface.
Leather is non-porous (or at least coated). Liquid sits on top. That means you can wipe it clean, but you have to be careful not to dry it out or crack it.
The cleaning agents are different too. Fabric can handle mild alkaline cleaners like diluted dish soap. Leather needs a pH-neutral cleaner, ideally between 6 and 8.
Anything too acidic or alkaline will strip the finish and cause cracking over time. That’s not a marketing gimmick. It’s basic chemistry.
The Second Decision: What Kind of Stain Are You Dealing With?
Once you know the material, you need to identify the stain. This matters because the wrong treatment can set a stain permanently. Think of it like this: you wouldn’t use hot water on blood (it cooks the protein into the fabric), and you wouldn’t use dish soap on grease (it just spreads it around).
Here’s a simple breakdown:
| Stain type | Examples | First step | Cleaner |
|---|---|---|---|
| Organic | Vomit, urine, blood, coffee, food | Blot cold, don’t rub | Enzymatic cleaner (breaks down proteins) |
| Oil / grease | Sunscreen, makeup, body oil, butter | Blot with dry cloth | Degreaser or rubbing alcohol |
| Water-based | Soda, juice, mud, rain | Blot immediately | Mild detergent + water |
| Dye | Ink, blue jeans transfer, marker | Blot, no scrubbing | Rubbing alcohol (test first) |
| Unknown | Mystery spot | Blot with water first | Avoid heat until you know |
Organic Stains (Blood, Vomit, Urine, Coffee, Food)
These are the most common and the most urgent. The longer they sit, the harder they are to remove. Organic stains contain proteins that bond to fabric fibers when heated.
That means hot water is your enemy. Use cold water. Blot, don’t rub.
Apply an enzymatic cleaner, let it sit for 10 to 15 minutes, then blot again.
Oil & Grease Stains (Sunscreen, Makeup, Butter, Body Oils)
Oil and water don’t mix. That means a water-based cleaner won’t touch these stains. You need a solvent.
Rubbing alcohol (70% isopropyl) works well on most fabrics. Dab it on, let it sit for 30 seconds, then blot. For leather, a dedicated leather cleaner is safer.
Water-Based Stains (Soda, Juice, Mud, Rain Spots)
These are the easiest to handle. Blot up as much liquid as you can. Then use a mild detergent solution.
Work from the edges of the stain inward to avoid spreading it. Rinse with a damp cloth to remove soap residue.
Mystery Stains You Can’t Identify
If you don’t know what it is, don’t guess. Start with the mildest option: cold water and a microfiber cloth. Blot, don’t rub.
If that doesn’t work, switch to a mild detergent. If that still doesn’t work, move to rubbing alcohol. And always test on a hidden area first.
The last thing you want is to turn a small mystery stain into a permanent bleach spot.
The Step-by-Step Workflow for Fabric Seats
Now let’s get to the actual cleaning. This workflow assumes you’ve already identified the material as fabric. If you’re working with leather, skip to the leather section later in the article.
Prep Work: Vacuum Like You Mean It
You can’t clean a surface that’s covered in loose dirt. Grab a vacuum with a crevice tool and an upholstery brush. Go over the seat thoroughly.
Get into the seams, the crevices between the seat bottom and backrest, and the area around the seat belt buckle.
If you’ve got a child car seat, vacuum the harness slots too. Crumbs love to hide there. For more on the basics of getting your baby’s travel gear ready, our guide on newborn essentials covers the full picture.
The Spray-Dwell-Blot Method for Fresh Stains
Fresh stains are the easiest to handle. Here’s the process:
- Spray the stain with your cleaning solution. Don’t soak it. A light mist is enough.
- Dwell for 5 to 10 minutes. Let the cleaner break down the stain.
- Blot with a clean microfiber cloth. Press down firmly, then lift. Don’t rub. Rubbing spreads the stain and pushes it deeper into the foam.
Repeat until the cloth comes away clean. Then blot once more with a damp cloth to remove any soap residue.
The Extraction Method for Set-In Stains
Set-in stains need more work. You’ll need to extract the dirt, not just move it around. A wet/dry vacuum or a spot cleaner works best.
If you don’t have one, you can use a clean, dry microfiber cloth and a lot of patience.
- Apply the cleaner and let it dwell for 10 minutes.
- Use a soft brush to gently agitate the stain. Work in small circles.
- Blot vigorously with a dry cloth to lift the dirt.
- If you have a spot cleaner, use it to extract the moisture. If not, keep blotting until the cloth is mostly dry.
Drying Without the Mold
This is the step most people mess up. A wet seat that doesn’t dry properly will develop mildew within 24 to 48 hours. That smell is almost impossible to get out.
- Open all the car doors for airflow.
- Point a fan at the wet area.
- If possible, park in the sun with the windows cracked.
- Check the foam by pressing your finger into the seat. If it feels damp, it’s not dry.
Do not sit on the seat until it’s completely dry. Your body heat and weight trap moisture in the foam. That’s how you get a permanent musty smell.
If you’re dealing with a baby’s car seat, make sure the harness straps are dry before reinstalling the seat. Wet straps can weaken over time, and that’s a safety issue you don’t want to gamble with. The NHTSA provides clear guidelines on child restraint safety, including proper cleaning practices.
The Step-by-Step Workflow for Leather Seats
Leather is different from fabric in almost every way that matters. It doesn’t absorb liquid, so stains sit on the surface. That’s good news.
But it’s also more fragile. Harsh cleaners, too much water, or even the wrong brush can ruin the finish permanently.
Why Less Is More
The golden rule for leather is simple. Use the gentlest cleaner that works. Start with plain water on a microfiber cloth.
If that doesn’t cut it, move to a dedicated leather cleaner with a pH between 6 and 8. Test it on a hidden spot first, like under the seat or behind a panel.
Never use all-purpose cleaners, bleach, vinegar, or ammonia on leather. Our research shows that these common household products strip the protective coating. Once that coating is gone, the leather dries out, cracks, and stains permanently.
Gentle Cleaning That Actually Works
Here’s the process that manufacturer specs consistently recommend:
- Start with a dry microfiber cloth to remove loose dust and debris.
- Apply a small amount of leather cleaner to a separate cloth. Never spray directly onto the seat.
- Wipe the surface in gentle, overlapping strokes. Don’t scrub.
- Use a second damp cloth to remove any cleaner residue.
- Dry the seat with a clean, soft cloth immediately.
That’s it. For most routine cleaning, that’s all you need. For tougher stains, let the cleaner sit for 30 seconds before wiping.
But don’t let it dry on the surface. That leaves a film.
Conditioning – When It Helps and When It Hurts
Leather conditioner is not always necessary. Modern automotive leather is almost always coated with a protective polyurethane layer. That coating is what you’re cleaning, not the actual hide.
Conditioner sits on top of that coating. It can make the seat look nice for a few days, but it doesn’t penetrate.
If your seats are genuine leather and feel dry to the touch, a light conditioner can help. Apply it sparingly. Buff it off completely.
Too much conditioner leaves a slippery residue that attracts dirt. For coated leather, skip the conditioner entirely. It’s wasted effort.
The Third Decision: Full Seat or Spot Clean?
This is a judgment call. You need to decide whether to clean the whole seat or just the stained area. The wrong choice can leave you with a patchy, uneven look.
When Spot Cleaning Is Enough
Spot cleaning works for fresh stains on a seat that’s otherwise clean. If the rest of the seat looks good, just treat the affected area. The key is to blend the edges.
Feather the cleaner outward from the stain so there’s no hard line between clean and dirty.
Spot cleaning also works for small stains that haven’t had time to set. A coffee spill from this morning is a good candidate. A coffee spill from last week probably needs a full seat treatment.
When You Need to Clean the Whole Thing
If the seat has multiple stains, visible soil lines, or an overall dingy look, clean the whole thing. The same goes for odor issues. A spot clean won’t remove a smell that’s soaked into the foam.
For child car seats, the rule is different. If you’re removing the cover for washing, clean the whole cover. Don’t spot clean a removable cover.
The color will fade unevenly. For more on the basics of baby gear care, you might want to check out our guide on what you really need to have on hand before the baby arrives.
The Big Mistakes That Ruin Car Seats
Some mistakes are fixable. Others are permanent. Here are the ones that cause the most damage.
Overwetting and the Mold You Can’t See
This is the number one mistake. People spray too much cleaner, soak the seat, and assume it will dry. It won’t.
Not in the time you think. The foam underneath acts like a sponge. It holds moisture for days.
Mold starts growing in 24 to 48 hours. By the time you smell it, the damage is done.
The fix is simple. Use less liquid than you think you need. Mist, don’t soak.
And always dry with airflow.
Using the Wrong Brush
A stiff brush shreds fabric fibers. It leaves a fuzzy, worn look that’s permanent. For fabric, use a soft-bristle upholstery brush.
For leather, use a microfiber cloth only. No brush at all.
Skipping the Test Patch
You’re in a hurry. You spray the cleaner on the most visible spot. Fifteen seconds later, the color has faded or the fabric has a light ring.
That’s what happens when you skip the test patch.
Always test on a hidden area. Under the seat, behind the seat belt anchor, or on the bottom edge. Wait 30 seconds.
Check for color change. If it looks fine, proceed.
Heat Setting a Stain
Heat is the enemy of protein stains. Blood, vomit, milk, and egg all contain proteins. When you apply heat, those proteins bond to the fabric fibers permanently.
That means no hot water, no steam, and no hair dryer on hot setting.
If you’re not sure what the stain is, assume it’s protein-based. Use cold water only. You can always try heat later.
You can’t undo it.
What About Child Car Seats? (Different Rules)
Child car seats follow different rules. The stakes are higher because safety is involved. The NHTSA guidelines are clear on this.
Never use harsh chemicals, bleach, or aftermarket protectants on a child car seat. Those chemicals can weaken the plastic shell and the harness straps.
Here’s what works for child car seats:
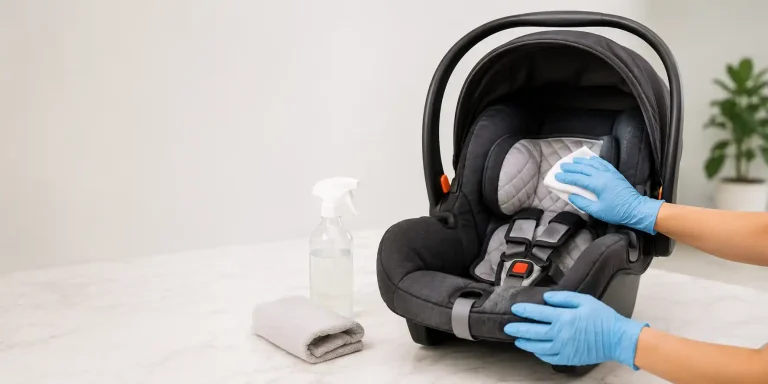
- Remove the cover if it’s removable. Wash it in cold water with a mild detergent. Air dry only. Never put it in the dryer.
- Clean the harness straps with a mild soap and water. Wipe them down. Do not soak them. Wet straps can weaken over time.
- Clean the plastic shell with a damp cloth. Mild soap if needed. Dry thoroughly.
- Never use fabric protectant, leather conditioner, or any spray-on coating on the harness or the shell.
If you’re dealing with a car seat that’s been through a major accident, replace it. Don’t try to clean and reuse it. The same goes for seats that have been submerged in floodwater.
The foam can’t be fully cleaned, and the integrity is compromised. For more on keeping your baby safe and comfortable on the road, our guide on calming a fussy baby in the car seat covers some helpful strategies.
How Fast Can You Expect This to Dry?
Drying time depends on three things. The material, the amount of liquid used, and the airflow.
| Material | Light clean (mist only) | Deep clean (wet extraction) | With fan |
|---|---|---|---|
| Fabric | 2 to 4 hours | 12 to 24 hours | 4 to 8 hours |
| Leather | 30 minutes to 1 hour | 1 to 2 hours | 30 minutes |
| Synthetic leather | 30 minutes to 1 hour | 1 to 2 hours | 30 minutes |
These are estimates. High humidity slows everything down. Direct sun and low humidity speed it up.
If you’re cleaning in a humid climate, use a fan or a dehumidifier. Park with the windows cracked if you’re in a safe area.
Don’t sit on the seat until it’s dry. Press your palm into the foam. If it feels cool or damp, wait longer.
If you smell a musty odor, you’ve got trapped moisture. Open the doors and let it air out. That smell is mold beginning to grow.
When to Call a Pro vs. When to DIY
Most car seat cleaning is doable at home. Spot stains, light dirt, and routine freshening cost under $20 in supplies. You can handle those yourself.
Call a professional when the seat has deep-set odors, mold, or stains that won’t budge after two attempts. Pros use industrial extractors that pull water and dirt from deep in the foam. That’s equipment you can’t rent from a hardware store.
The cost runs $100 to $300 per seat. For a single tough stain, that’s usually worth it.
Quick Reference Decision Guide
| Your situation | What to do | Drying time |
|---|---|---|
| Fresh coffee spill on fabric | Blot with cold water, mild detergent, blot again | 2 to 4 hours |
| Old pet stain on fabric | Enzymatic cleaner, let dwell 15 minutes, extract | 12 to 24 hours |
| Light dust on leather | Wipe with damp microfiber cloth | 30 minutes |
| Deep set stain on leather | pH-neutral cleaner, gentle wipe, condition if dry | 1 to 2 hours |
| Child car seat, full clean | Remove cover, wash cold, air dry. Wipe shell and straps | 24 hours |
| Mold smell inside seat | Professional extraction needed | Varies |
Frequently Asked Questions
Can I use vinegar to clean my car seats?
Vinegar is acidic. It works on some fabric stains but it can damage leather and leave a strong smell. For fabric, dilute it 1:3 with water.
For leather, skip it entirely. Use a pH-neutral cleaner instead.
How often should I clean my car seats?
Light cleaning every 2 to 3 months keeps dirt from building up. Deep cleaning once a year is enough for most people. If you have kids or pets, bump that to every 6 months.
Will baking soda remove car seat odors?
Baking soda absorbs surface odors. Sprinkle it on the seat, let it sit for 30 minutes, then vacuum thoroughly. It won’t remove deep smells from the foam.
Those need extraction.
Can I use a steam cleaner on my car seats?
Steam works on fabric seats but avoid it on leather. The heat can dry out and crack the leather coating. On fabric, keep the steam setting low.
Don’t soak the foam.
How do I get rid of cigarette smoke smell in car seats?
Smoke odor clings to fabric and foam. Start with a deep vacuum. Then use an enzymatic cleaner designed for smoke.
Let it dwell. Extract with a spot cleaner. Repeat if needed.
Professional ozone treatment may be necessary for heavy smoke.
Is it safe to use fabric protector spray on car seats?
Fabric protector like Scotchgard works well on factory fabric seats. It helps repel future spills. Never use it on child car seats.
The NHTSA warns that aftermarket protectants can weaken the harness webbing and affect flame resistance.