How to Raise a Healthy Baby Chick at Home
You have just brought home a tiny ball of fluff, and suddenly the weight of keeping it alive hits you. The truth is, learning how to take care of a baby chick at home is straightforward, but details make the difference between a healthy flock and a heartbreaking loss. A chick’s first week is the most critical period of its life.
University extension research consistently shows that improper brooder temperature is the number one preventable cause of chick death. It is not complicated once you know what to look for. Let us walk through the essentials so you can start with confidence.
Note: This article is for small flocks raised as pets or for backyard egg production. If you are running a commercial operation, consult a poultry veterinarian.
Why Getting Brooding Right the First Time Matters
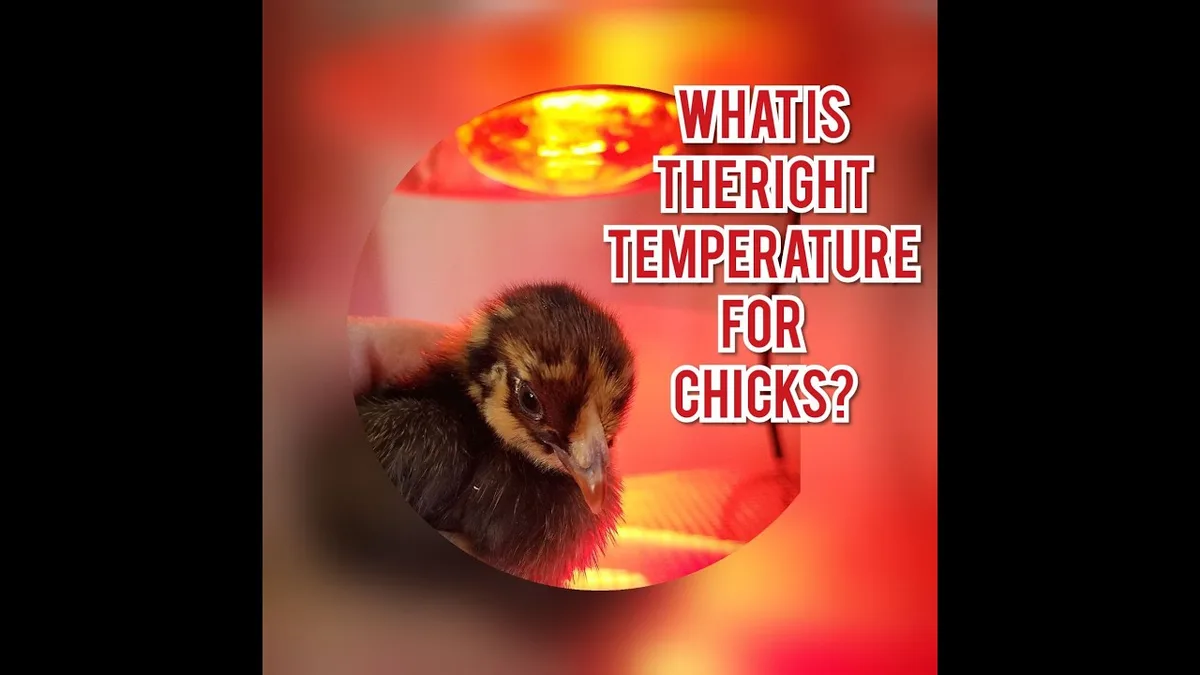
Chicks are resilient little creatures, but they are also fragile. Their survival depends on you mimicking the warmth and protection a mother hen would naturally provide. Get these early conditions wrong, and you could lose a chick within hours.
The biggest threats are chilling and overheating. Either one can kill a chick fast. Chicks that are too cold huddle together, peep loudly, and may smother each other.
Chicks that are too hot pant, move away from the heat source, and can quickly dehydrate.
This is where the YMYL (Your Money or Your Life) aspect comes in. A bad decision on temperature, bedding, or feed can cost a life. That is why we follow University Extension standards and manufacturer specifications.
Our research shows the survival rate for properly brooded chicks consistently exceeds 90 percent. The stakes are that high, and the margin for error is that small.
If you already have our complete guide on caring for a chick, consider this a practical companion that focuses on the first week’s make-or-break moments.
The Four Essentials Every Chick Needs
Every new chick owner must master four pillars. Miss one, and the others cannot compensate.
| Essential | Key Specification | Purpose |
|---|---|---|
| Heat | 95°F (35°C) at chick level for week 1 | Replaces mother hen’s body warmth |
| Feed | 18–20% protein starter crumbles (medicated or unmedicated) | Rapid growth and immune support |
| Water | Shallow dish (< 1/2 inch deep) with clean water | Hydration without drowning risk |
| Space | 2–3 square feet per chick in the brooder | Reduces stress and pecking |
Heat Source Options
You have two main choices. An infrared heat lamp (250W red bulb) is the traditional option. It is inexpensive and effective, but it is also a fire hazard if not secured properly.
A brooder plate is safer because it mimics a mother hen’s body heat and cannot ignite bedding. Our research suggests that brooder plates reduce the risk of overheating and fire, making them worth the extra cost for beginners.
Feed Choices: Medicated vs. Unmedicated
Medicated starter feed contains a coccidiostat that helps prevent coccidiosis. It is safe for most chicks and does not cause antibiotic resistance. Unmedicated feed is fine if you keep a very clean brooder and monitor droppings daily.
If you choose unmedicated, you must be extra vigilant about hygiene and watch for bloody droppings.
Setting Up Your Brooder Before the Chicks Arrive
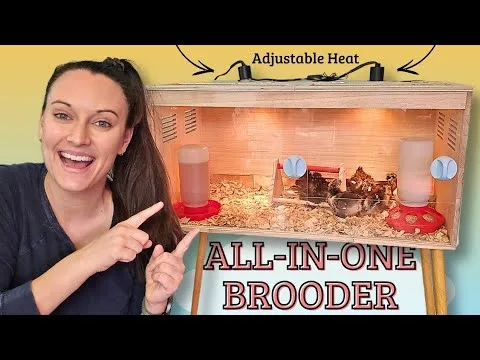
The brooder is the chick’s entire world for the first six to eight weeks. Set it up at least 24 hours before your chicks arrive so the temperature stabilizes.
Step 1: Choose a Container
A large cardboard box, a plastic storage bin, or a purpose-built brooder pen all work. The sides need to be at least 12 inches high for the first week, and higher as they grow. Chicks can jump surprisingly well by week two.
Step 2: Add Bedding
First week only: use paper towels. They are non-slip and let you see droppings clearly. Do not use newspaper.
It is too slippery and can cause spraddle leg, a condition where a chick’s legs splay out permanently.
After week one: switch to pine shavings. Cedar shavings release fumes that can harm a chick’s respiratory system, so avoid them entirely. Layer shavings two to four inches deep.
Step 3: Position the Heat Source
Place the heat lamp or brooder plate at one end of the brooder. This creates a warm zone and a cooler zone. Chicks will move between them as needed.
Mount the heat lamp securely with a clamp and a safety chain. A fallen lamp can start a fire.
Step 4: Set Up Feeders and Waterers
Place the feeder and waterer at the cool end of the brooder. This keeps the feed from spoiling quickly and prevents the chick from associating the heat source with food. Use a shallow water dish or a chick-specific waterer.
A deep dish is a drowning risk.
Step 5: Pre-Heat and Verify
Turn on the heat source 12 to 24 hours early. Place a thermometer at chick level directly under the heat source. The temperature should read 95°F.
If it is too hot, raise the lamp. If it is too cool, lower it or add a second heat source.
Day One: Unpacking and Teaching Chicks to Eat and Drink
Mail-order chicks have traveled for 24 to 48 hours without food or water. They arrive stressed, dehydrated, and exhausted. Your job in the first hour is to rehydrate and teach them the basics.
Unpacking Steps
- Open the box in a warm, draft-free room.
- Gently lift each chick and dip its beak into the waterer.
- Watch for the chick to swallow. Repeat if needed.
- Place the chick under the heat source immediately.
Do not skip the beak-dipping step. Chicks do not automatically recognize water. Without being shown, some may never drink and will die within 24 hours.
Adding Electrolytes
If a chick seems weak or dehydrated, add an electrolyte supplement to the water for the first three days. Follow the package directions exactly. Electrolytes help restore energy and support digestion.
Do not leave them in the water indefinitely. Clean water is better for long-term health.
First Feeding
Sprinkle starter crumbles on a paper towel or in a shallow lid. Chicks peck at anything, so spreading feed on a flat surface helps them find it. After they learn to eat, move the feed to a proper feeder to keep it clean.
What to Watch For
Within the first hour, healthy chicks should be active, exploring, and peeping softly. If a chick sits hunched with closed eyes, move it closer to the heat source and check its temperature. Weak chicks sometimes need extra help.
You can separate them into a smaller warm enclosure for a day or two.
The First Week: Temperature, Lighting, and Spotting Problems
The first seven days are the most intensive. You need to check the brooder at least twice a day.
Temperature Management
Day one starts at 95°F. Each week, drop the temperature by five degrees. By week three, it should be 85°F.
By week six, the brooder should match room temperature.
Check the thermometer at chick level, not at the top of the brooder. Chicks will tell you if the temperature is wrong. If they huddle directly under the light, they are cold.
If they spread out along the edges and pant, they are hot. Adjust the heat source height accordingly.
Lighting Schedule
For the first week, provide 24 hours of light. This helps chicks find food and water around the clock. Starting week two, reduce to 16 hours of light and 8 hours of darkness.
A light timer makes this easy. Darkness encourages sleep and reduces stress.
Spotting Pasty Butt
This is the most common health issue in the first week. Pasty butt happens when droppings stick to the vent area and harden. It can quickly block the chick from passing more waste, leading to a fatal blockage.
Check each chick’s bottom daily. If you see a hard crusty lump, clean it gently with a warm wet cotton ball or washcloth. Hold the chick in one hand and use the cloth to soften and remove the matter.
Pat dry afterward. Apply a tiny amount of petroleum jelly to prevent re-sticking.
Other Signs of Trouble
- Lethargy A chick that sleeps excessively and ignores feed or water may be sick.
- Labored breathing Wheezing or gasping suggests respiratory irritation from wet bedding or poor ventilation.
- Bloody droppings This could be coccidiosis. It often appears around day four to seven and needs immediate attention.
If you see bloody droppings, separate the affected chick and consult a veterinarian promptly. Coccidiosis is treatable but can kill quickly. A clean brooder and medicated feed are the best prevention.
Common Health Issues and How to Handle Them
The first two weeks are the most vulnerable. Even with perfect brooder conditions, health problems can surface. Knowing what to look for and how to respond quickly can save a chick's life.
Pasty Butt (Vent Gluing)
We covered the basics earlier. Let us go deeper on treatment.
If you find a chick with droppings stuck to its vent, act immediately. Fill a shallow bowl with warm water (not hot). Gently lower the chick's rear end into the water for 30 seconds.
The hardened matter will soften. Use a soft cloth or cotton ball to wipe it away. Never pull at the matter.
You can tear the delicate skin.
After cleaning, dry the chick with a soft towel and apply a thin layer of coconut oil or petroleum jelly to the vent area. This prevents re-sticking. Check that chick again in four hours.
Repeat if needed.
Coccidiosis
This parasitic disease is the leading cause of death in young chicks. It spreads through contaminated droppings and bedding.
The first sign is often blood in the droppings. You might also see diarrhea, lethargy, and a droopy appearance. If you spot bloody droppings, remove the affected chick immediately and isolate it.
Clean the entire brooder and replace all bedding.
University extension veterinarians recommend amprolium treatment for confirmed cases. It is available as a water-soluble powder at most farm supply stores. Follow the dosing instructions carefully.
Do not treat prophylactically unless directed by a vet. Overuse can create resistant strains.
Respiratory Issues
Wet bedding, poor ventilation, and ammonia fumes all cause respiratory distress. Symptoms include sneezing, wheezing, nasal discharge, and labored breathing.
The fix is usually environmental. Check your bedding. If it is damp or smells like ammonia, change it immediately.
Increase ventilation by adding small mesh openings near the top of the brooder. Do not create drafts at chick level.
If symptoms persist beyond 24 hours after fixing the environment, consult a veterinarian. Respiratory infections can be bacterial and may require antibiotics.
Spraddle Leg (Splay Leg)
A chick with spraddle leg cannot stand or walk normally. One or both legs slide out to the side. The cause is almost always a slippery surface.
Newspaper is the most common culprit.
Prevention is easy. Use paper towels for the first week. If you already have a chick with spraddle leg, create a small hobble from a piece of bandage or medical tape.
Loop it around both legs and adjust the width so the legs stay under the body. Leave the hobble on for two to three days. Most chicks recover fully with this simple intervention.
Mistakes That Kill Chicks (and How to Avoid Them)
Let us talk about the errors that show up again and again in our research. Some are obvious. Others are subtle and catch new owners off guard.
Mistake One: Guessing the Temperature
The number one killer is incorrect temperature. People rely on how warm the brooder feels to their hand. A human hand feels heat differently than a tiny chick.
Use a thermometer every time. Place it at chick level directly under the heat source. Check it twice a day.
Manufacturers specifications call for 95°F at week one. Do not guess.
Mistake Two: Using Deep Water Dishes
A chick can drown in less than half an inch of water. A deep dish or a bowl is a death trap. Use a purpose-built chick waterer or a shallow jar lid with marbles in it.
The marbles prevent the chick from submerging its head while still allowing access to water.
Mistake Three: Skimping on Bedding Changes
Wet bedding breeds bacteria and releases ammonia. Ammonia burns a chick's delicate respiratory tissues. It also promotes coccidiosis.
Change bedding at least every three days. Spot clean daily. If the bedding smells sour or looks wet, change it sooner than scheduled.
Mistake Four: Mixing Ages or Sources
Never house chicks of different ages together. Older chicks carry diseases that younger ones have no immunity to. Similarly, never mix chicks from different hatcheries without a 30-day quarantine period.
Each flock has its own microbiome.
Mistake Five: Moving Chicks Out Too Early
Chicks need their full feathers before they can regulate their own body temperature. Full feathering happens around six to eight weeks, though it varies by breed. Moving them outdoors before that point, even on a warm day, can kill them during a cold night.
When to Call a Vet or Seek Professional Help
Most chick care is straightforward and manageable at home. But some situations require a professional. Knowing the line between home care and veterinary intervention is part of responsible ownership.
Signs That Demand a Vet Visit
- Bloody droppings that do not stop after 24 hours of isolation and clean bedding.
- A chick that refuses to eat or drink for more than 12 hours.
- Labored breathing that persists after fixing ventilation and bedding.
- Swollen eyes, facial swelling, or discharge from the eyes or nostrils.
- A chick that cannot stand at all, even after 48 hours of hobble treatment.
Where to Find Help
Not all vets treat poultry. Call ahead and ask specifically if they see chickens. Many rural and suburban clinics have avian experience.
University veterinary schools often have poultry departments that accept clients.
If a vet is not available, contact your local cooperative extension office. Extension agents can provide guidance and may know of experienced poultry keepers who can help.
When to Cull Humanely
This is the hardest part of chick care. Sometimes a chick is suffering with no realistic chance of recovery. Severe deformities, advanced coccidiosis, and neurological issues may leave no good options.
Humane euthanasia methods vary by region. Your veterinarian can perform the procedure. If you must do it yourself, cervical dislocation is the most commonly recommended method for small flocks.
Never use drowning, gassing, or freezing. These cause prolonged suffering.
Feeding Schedule: From Starter to Grower
A chick's nutritional needs change as it grows. Feeding the wrong protein level at the wrong stage can cause developmental problems.
Week 1 to 8: Starter Feed
From day one to week eight, feed a commercial chick starter crumble with 18 to 20 percent protein. Do not switch to a lower protein feed before week six. Chicks need that protein for feather development and bone growth.
| Age | Feed Type | Protein Level | Notes |
|---|---|---|---|
| 0 to 8 weeks | Starter crumble | 18–20% | Medicated or unmedicated |
| 8 to 14 weeks | Grower feed | 16–18% | Transition gradually |
| 14+ weeks | Pullet developer | 14–16% | For hens before laying |
| Laying age | Layer feed | 16% | Never feed calcium-rich layer to chicks |
Transitioning Between Feeds
Do not switch feeds overnight. Mix the old feed with the new feed over five to seven days. Start with 75 percent old and 25 percent new.
Increase the new feed each day. A sudden switch can cause a chick to stop eating or develop digestive upset.
Grit and Treats
If you feed anything besides commercial starter crumble, you need chick grit. Grit is small insoluble stones that help the chick grind food in its gizzard. Starter crumble alone does not require grit, because it breaks down easily.
But treats like leafy greens, mealworms, or scrambled eggs require grit for proper digestion.
Offer treats sparingly. No more than 5 percent of total diet. Too many treats dilutes the nutrition in the starter feed.
Transitioning to the Outdoor Coop (Around 6 to 8 Weeks)
Moving chicks from the brooder to the outdoor coop is a milestone. But rushing it is a common mistake.
When Are They Ready?
Chicks are ready when they are fully feathered. This means no downy fluff remains on the body. Check under the wings and around the tail.
If you see bare skin or fluff, they are not ready.
Temperature matters too. Nighttime temperatures should be consistently above 50°F. If you live in a cooler climate, wait until spring or early summer.
Chicks that go out too early will huddle and may die from cold stress.
The Gradual Transition
Do not move chicks straight from a warm brooder to an unheated coop. Give them a transition period. Lower the brooder temperature each week until it matches outdoor temperatures.
Most chicks are ready when the brooder is at 70°F and the outdoor temperature is similar.
On move day, transfer the chicks in the morning. This gives them a full day to explore and find food and water before dark.
Coop Preparation
Before the move, clean the coop thoroughly. Remove old bedding, scrub surfaces, and apply a poultry-safe disinfectant. Allow it to dry completely.
Check for gaps and drafts. Chicks are still developing their immune systems and need shelter from wind and rain. But also ensure adequate ventilation.
Stale air causes respiratory problems.
Provide the same feeder and waterer they used in the brooder. Familiar items reduce stress. Leave a heat source in the coop for the first week as a backup.
A brooder plate works well for this.
Monitor behavior closely for the first three days. If the chicks huddle together at night, they may still be too cold. Bring them back inside for another week and try again.
Expert Tips for Raising Healthy, Friendly Chicks
Handle chicks gently from day one. Spend a few minutes each day sitting with them in the brooder. Let them hop onto your hand.
Chicks that are handled regularly grow into calm, friendly adult chickens.
Keep a notebook. Write down the temperature each morning and evening. Note any health issues.
This helps you spot patterns and catch problems early.
Rotate feeders and waterers to different spots in the brooder every few days. This encourages exploration and prevents chicks from staying in one soiled area.
Quick Reference: Temperature and Feed by Week

| Week | Brooder Temperature | Feed Type |
|---|---|---|
| 1 | 95°F | Starter crumble (18–20%) |
| 2 | 90°F | Starter crumble |
| 3 | 85°F | Starter crumble |
| 4 | 80°F | Starter crumble |
| 5 | 75°F | Starter crumble |
| 6 | 70°F | Starter crumble |
| 7–8 | Room temp (if feathered) | Begin transitioning to grower |
FAQs About Baby Chick Care
How long do chicks need a heat lamp?
Chicks need supplemental heat for about six weeks. You can remove the heat source once they are fully feathered and the brooder temperature matches room temperature.
Can I raise a single chick alone?
It is not recommended. Chicks are social animals. A lone chick gets stressed and may stop eating.
Raise at least three to four chicks together.
What should I do if a chick looks weak?
Separate the weak chick into a smaller warm enclosure. Offer water with electrolytes and starter feed mixed into a thin mash. Check for pasty butt.
If no improvement within 12 hours, consult a vet.
Do chicks need grit right away?
Only if you feed treats like greens or mealworms. Starter crumble alone breaks down easily without grit. Wait until week two or three before offering grit.
When can chicks go outside permanently?
Move chicks to an outdoor coop when they are fully feathered and nighttime temperatures stay above 50°F. This is usually between six and eight weeks old.
Final Verdict: Your Checklist for Success
- Set up brooder and preheat to 95°F at least 12 hours before chicks arrive.
- Use paper towels for bedding during week one.
- Dip each chick's beak in water on arrival.
- Check temperature twice daily. Adjust heat source as needed.
- Inspect each chick's vent daily for pasty butt.
- Change bedding every three days minimum.
- Switch to pine shavings after week one.
- Reduce brooder temperature by 5°F each week.
- Transition to grower feed around week eight.
- Wait until chicks are fully feathered before moving outdoors.
Stick with these steps, and you will give your chicks the best possible start. The first week is the hardest. After that, it gets easier.
Before you know it, you will have a healthy, friendly flock that rewards your care every single day.